

This really has been a week of starting lots of projects and getting nothing finished!
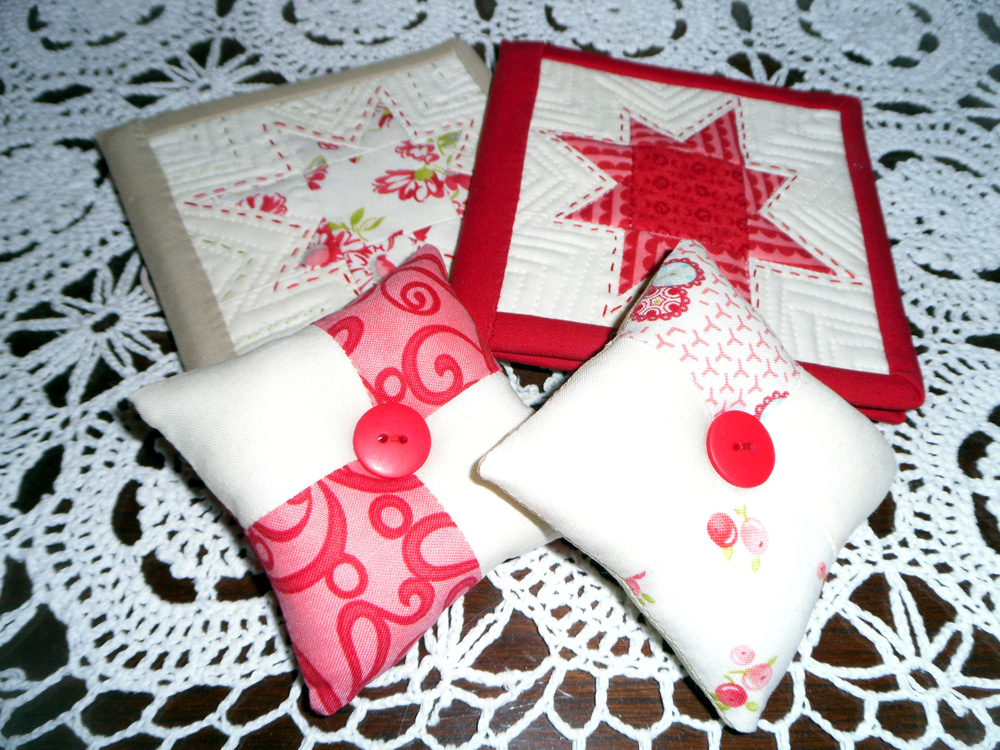
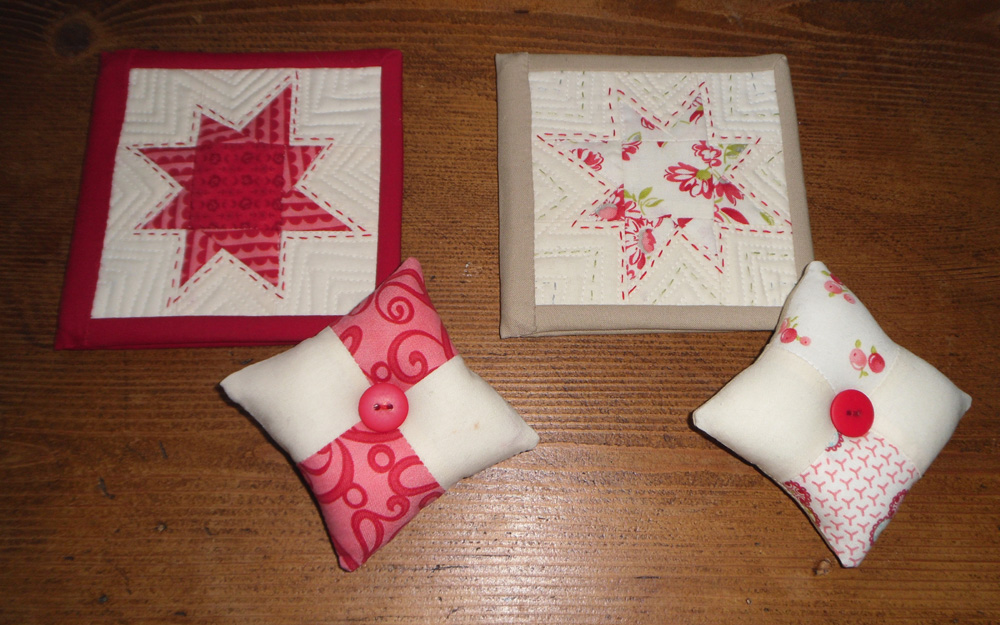
But today I made 2 small wonky star sewing cases with coordinating pincushions. I took photos as I went so I thought I’d include them in case anyone would like to make something similar. The sewing cases are 5 inches square and I used 5 inch square wonky star blocks and 10 inch layercake squares but it would be very easy to make one from charm squares and a length of jelly roll.
For one sewing case you will need:
6x 5 inch squares top fabric for inside, outside and pockets
2x 5 inch squares backing fabric (this won’t be seen)
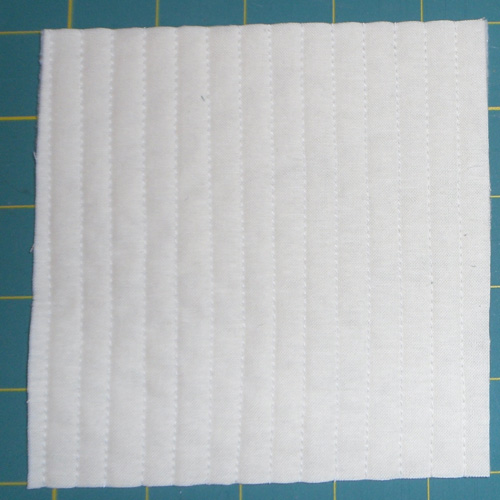
2x 5 inch squares batting
1x 4 inch square felt
2x 5×4 inch rectangles of interfacing (optional)
1x length of 2.5 inches by about 40 inches fabric for binding
Step 1 – outside front
Take your 5 inch block/front fabric and make a quilt sandwich with one piece of batting and one 5 inch piece of backing fabric.
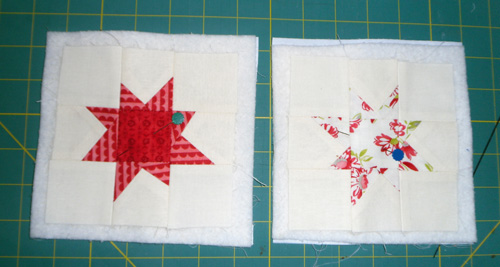
(I made wonky star blocks using tutorial by Victoria at The Silly Boo Dilly and scaling down the stars).
Step 2 – outside front ctd
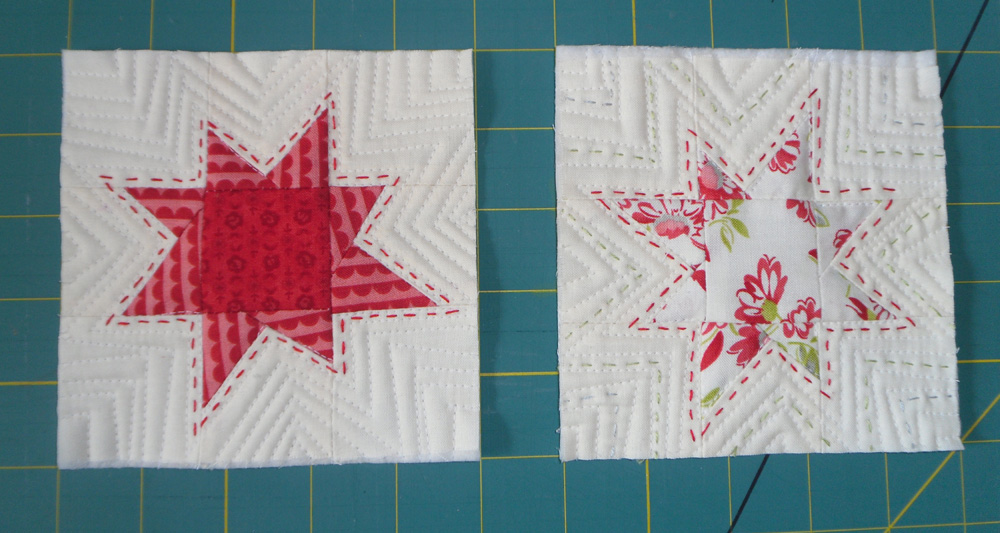
Quilt as desired.
(I tried to do a wonky shadow quilting but I’d offer a warning – less is more –
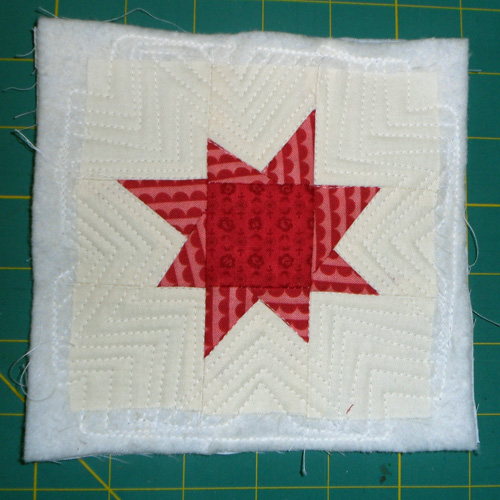
And I added a little hand stitching, mostly to try to make my white star stand out because I, foolishly, hadn’t thought about it disappearing into the background fabric!)
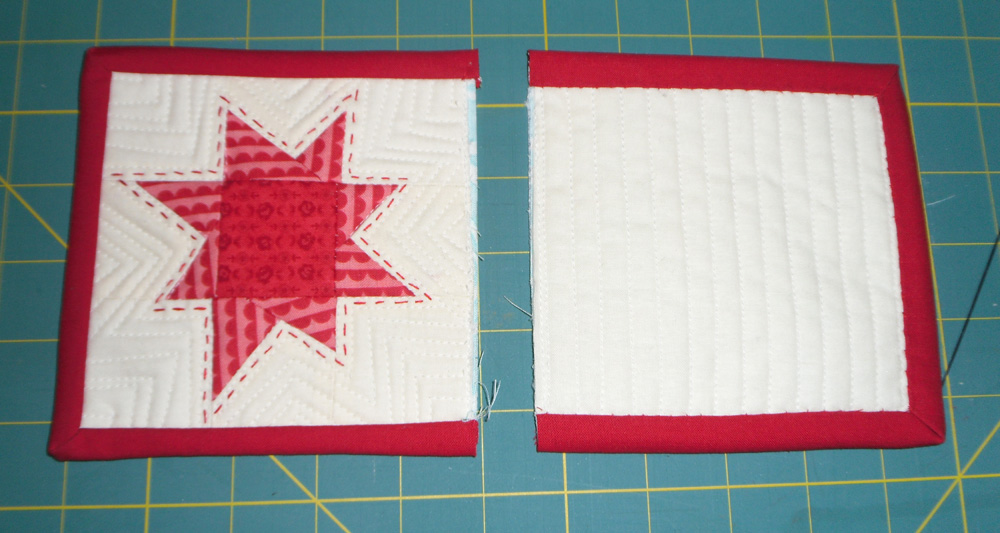
Step 3 – outside back
Make a quilt sandwich using one piece of top fabric (this will be the outside back of your sewing case), one 5 inch piece of batting and one 5 inch piece of backing fabric.
Quilt as desired.
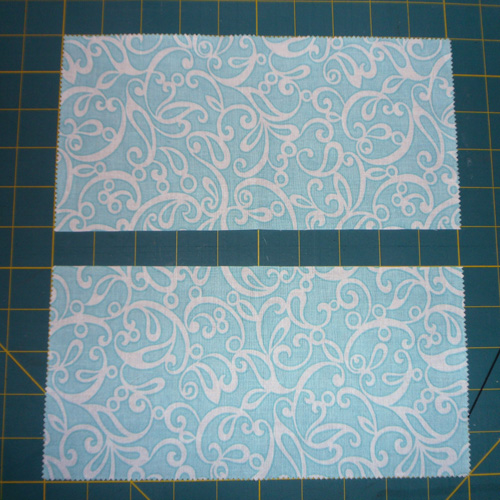
Step 4 – inside
Take your inside fabric pieces. This step requires four 5 inch square pieces of fabric but I used a 10×5 inch piece and made the vertical cut after the next step.
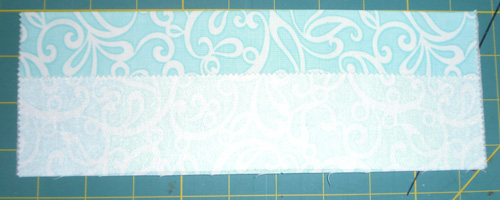
Step 5 – pockets
Take two 5×5 pieces (or one 10×5 piece) of your inside fabric from step 4 (above). Iron a 3.5 inch wide piece of interfacing onto the wrong side of your pocket fabric(s) aligning the interfacing with the bottom edge.
Fold down the top 1.5 inch of your pocket fabric(s) over the interfacing. Press and finish this edge as desired.
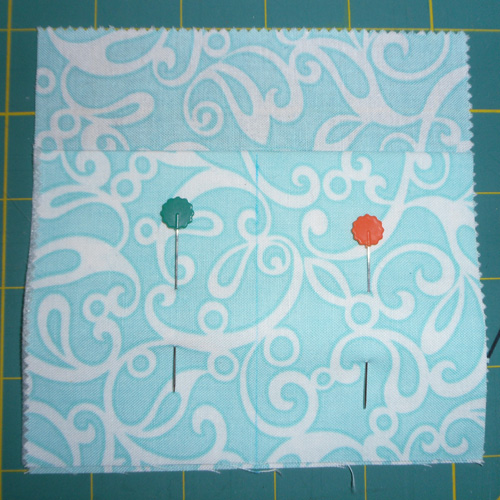
Step 6 – pockets ctd
Assemble as in picture below: Place one 5×5 inch square of inside fabric face up. Place pocket face up on top of it aligning bottom edges. Secure with pins.
Step 7 – binding
Make sandwiches of your inside/pocket units from step 6 (above) right side facing downwards and your front and back units (steps 2 and 3 above) facing upwards. Pin and bind as shown below. I used Jenna’s Quilt Binding Tutorial which you can find at Sew Happy Geek although I found the doubled binding fabric quite bulky on such a small piece and I will try binding with a single thickness of fabric if I make these again.
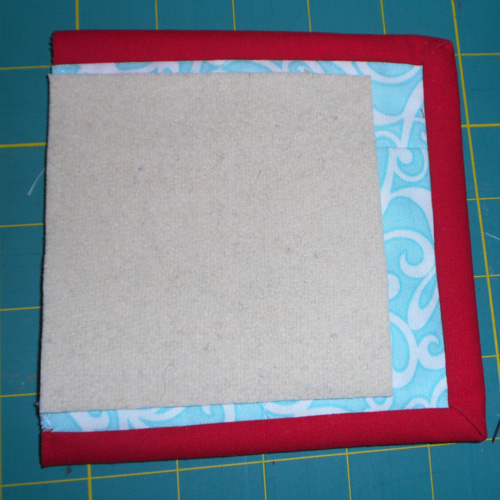
Step 8
Lay the back of your sewing case with the inside facing upwards, as shown below, and position your 4×4 square of felt as shown.
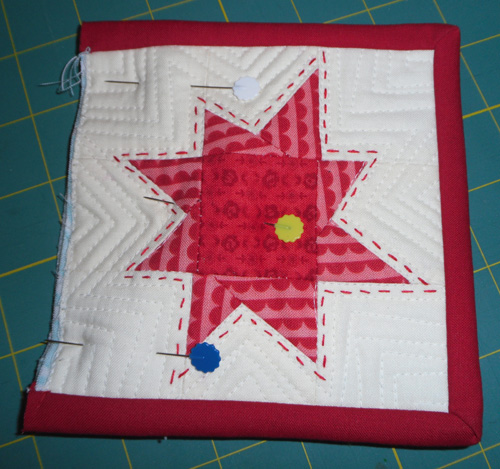
Step 9
Lay the front of your sewing case on top of the back + felt (step 8 above) as shown below. Pin and machine sew securely along the unbound edge. Begin and end your stitching line about an eighth of an inch from the top and bottom.
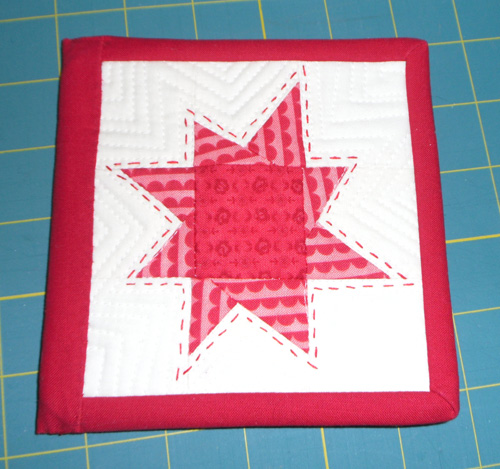
Step 10
Take a strip of your binding fabric and sew on to cover the machine stitching line you sewed in step 9 (above). Now the outside of your sewing case should look like this…
And the inside should look like this…
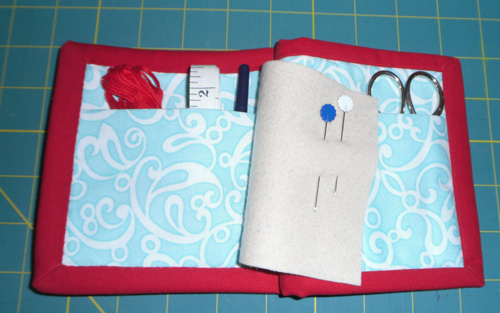
I made coordinating pincushions using 2 inch squares which you can probably work out how to make from the picture.

Archie the wonder dog
Cute sewing cases!
LikeLike
linda
thanks for this janine they look fab and i am wanting to make some !!
LikeLike
Connie
Love your wonky star and what a cute needle case!
LikeLike
Karen
I really love this – I haven't done a wonky star before but this is ia great idea to use a couple :) Thanks!
LikeLike
Craft Couture by T.C.
This is just adorable! thank you very much for a great tutorial :)
LikeLike
M-R
Thanks for the tutorial, Janine — I need a needle case and yours are fabulous! Thanks for linking up to TGIFF!
LikeLike
Katie
Those turned out really cute, I love the hand stitching detail!
LikeLike
Rosa
This is just gorgeous.I love your wonky stars blocks.
LikeLike
JanetK
I love your wonky stars! Now that I've decided hand stitching my binding is the way I want to go, I really need to make one of these little sewing books. Thanks for the tute!
LikeLike
Catherine
I really like your wonky stars – especially the hand sewing!
LikeLike
Heather
Those are SO cute! Love them! :o)
LikeLike
Kristy QP
Oh these are so cute! What a great idea! :)
LikeLike
Crafty Bags
I love the colourful wonky stars on needle case. I'd love to make one.
LikeLike
Katie
Great tutorial, Janine!
LikeLike