
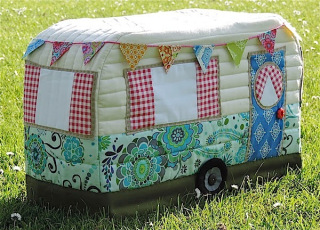

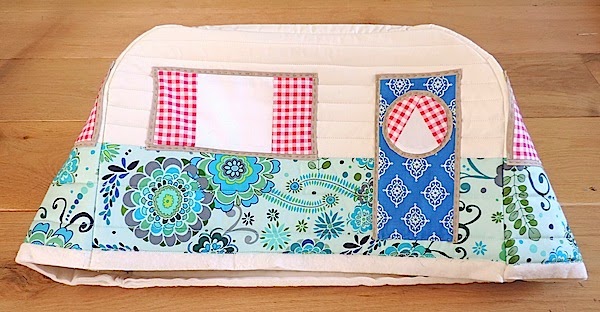
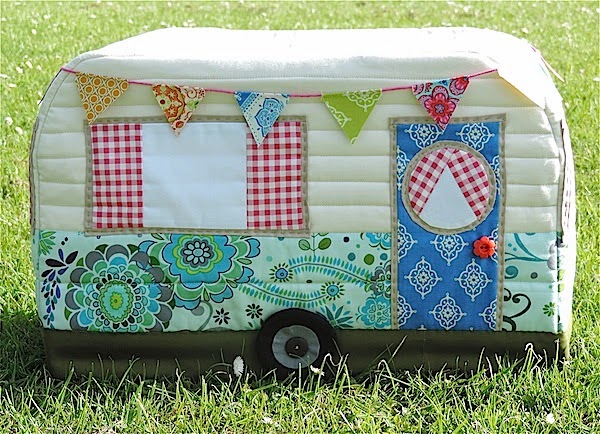
A Version 1 pattern for my Vintage Caravan Sewing Machine Cover is now available.

I am hoping to release the final version for sale, together with these instructions, in a few weeks but, in the meantime, you can download it for 50p The final version has been released and now costs £4.00 in my Etsy Shop. I had planned to offer it free but I discovered when I came to list it that Etsy doesn’t allow that. This pattern has not yet been tested, except by me in the making of this tutorial, so This pattern has now been made by a large number of independent sewists so I’m confident everything should go smoothly but if you come across anything that doesn’t make sense or doesn’t work as expected please contact me and we will try to resolve it.
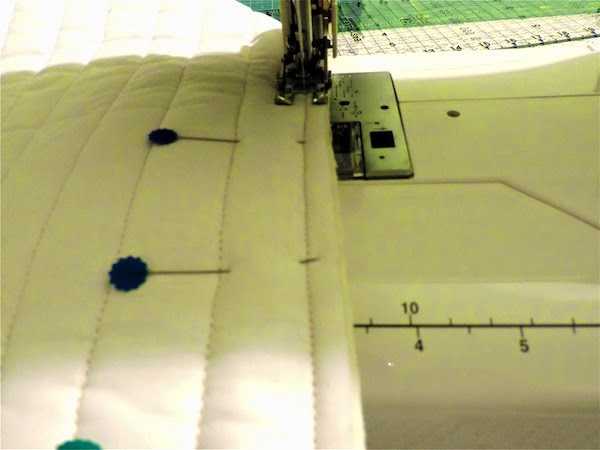
The basic construction is very simple but to enable the finished cover to be free standing I have used three layers of Hobbs Fusible Wadding. This means there is a LOT of thickness to sew through. A walking foot is essential and I strongly recommend that before you begin you test the viability of sewing through six layers of wadding + four layers of fabric on your machine. I have Janome Sewist 525S and it was possible but not easy.
If you find the thickness too much, you can (a) use two layers of wadding, (b) use wadding + a layer of heavy duty interfacing and/or (c) reinforce your main structure with further wadding or interfacing after you have completed Stage Six.
I would very much appreciate any suggestions for improving stitchability without compromising sturdiness or, indeed, any other feedback you may have.
Please leave your email address or a link to a social networking site where I can contact you if you leave a comment or question unless you are absolutely 100% certain you are not a noreply blogger.
VINTAGE CARAVAN SEWING MACHINE COVER TUTORIAL
(For information on adjusting the sizing, please click here)
(Measurements here are intended to give an indication only. Accurate sizes and cutting instructions are given below)
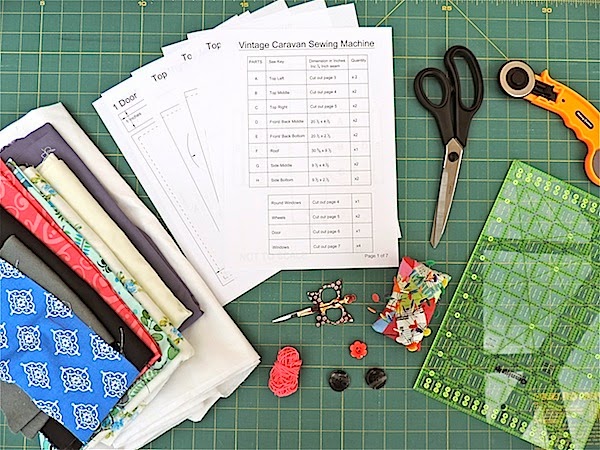
Wadding – 44″ X 90″
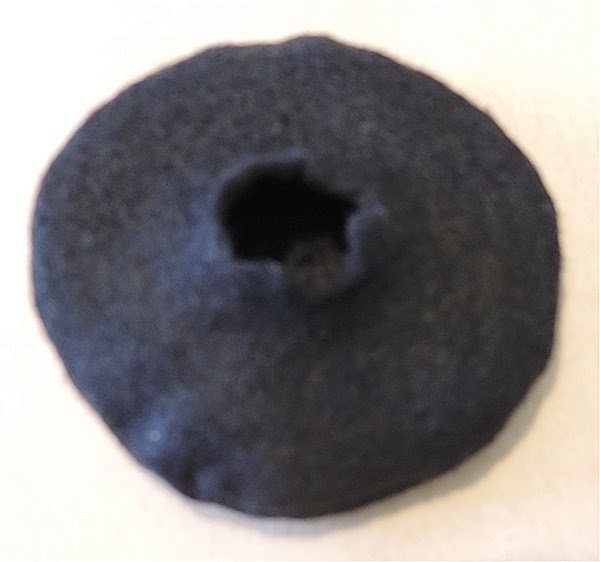
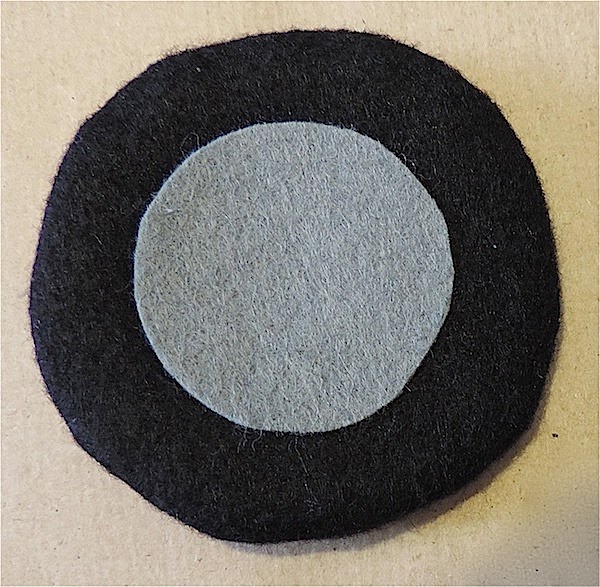
Wheel Hub Fabric – 5″ X 2 1/2 ” grey felt
Length of yarn – 56″
Double Sided Fusible Fabric – 36″ X 4″ + 5″ X 2 1/2 ”
Aluminium Foil – Approx 8″ X4″
Two Buttons to back Wheel Buttons
Paper Scissors
I recommend beginning with the lining because it acts as a rehearsal for sewing the final pieces without having to worry about the thickness of all the layers and because you can use it to make sure the cover will actually cover your machine comfortably.
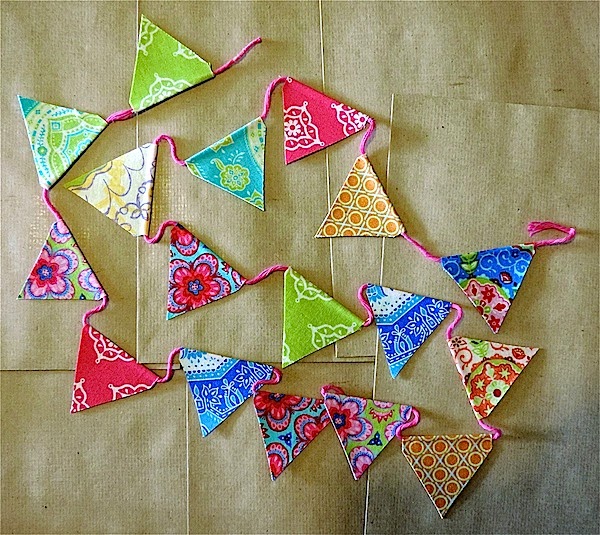
3. Align pattern pieces A, B and C with the side and top edges of the rectangles you cut in step 2 (above) and cut curve as illustrated below.


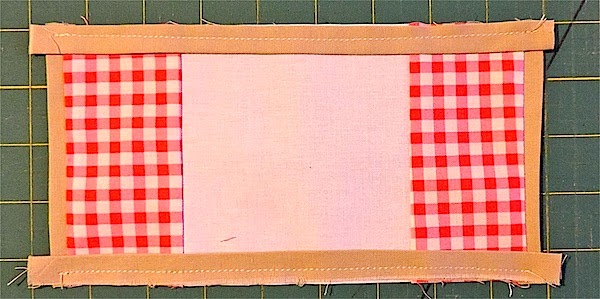
4. Mark the centre of each main piece and the strip with pins, as illustrated below.
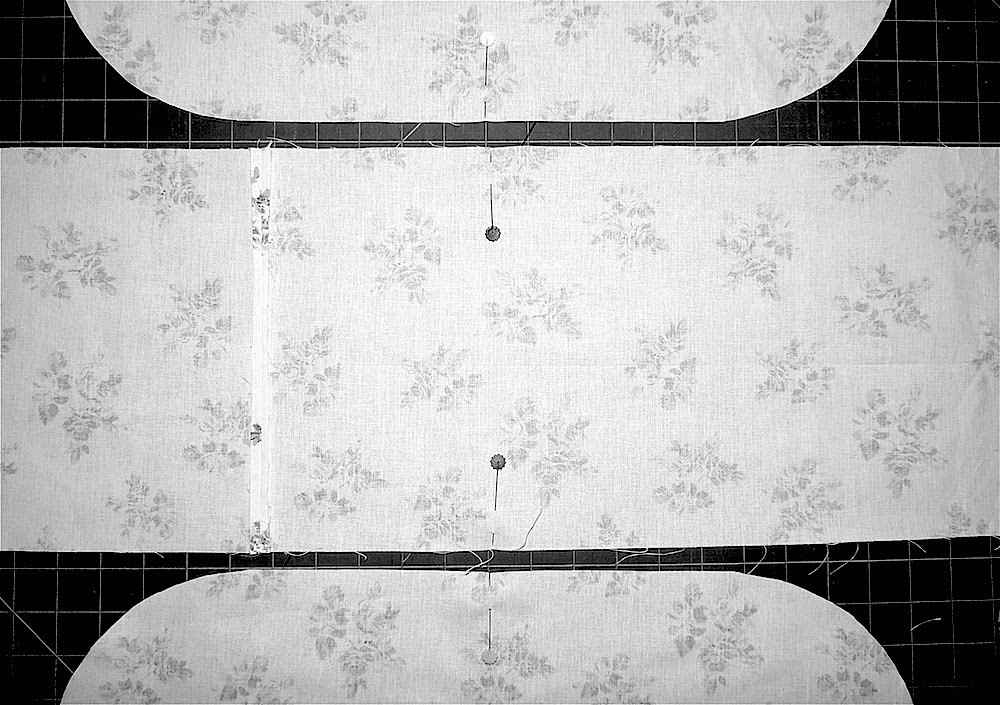
5. With right sides together, align the pins of one main piece with the pin on one side of the strip and, beginning at the centre point pin and sew.

6. Repeat with the other side. Do not turn right-side-out. Press and set aside.
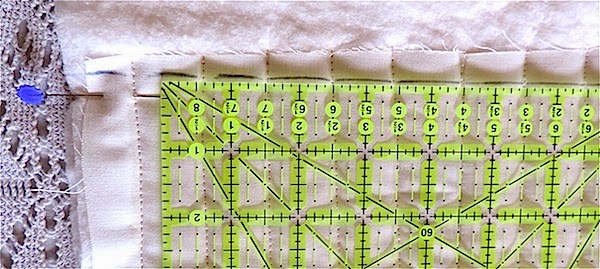
Please note that the fabrics in this stage are cut larger than the pattern pieces indicate to allow for any shrinkage/distortion when the layers are quilted so you can go a little into your selvedges as long as you remember to cut them off later.
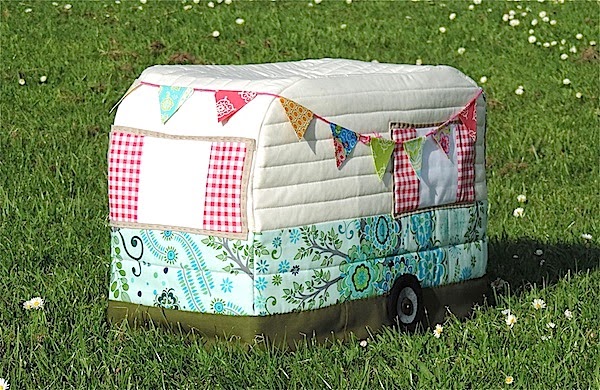
The main body of the caravan is very thick to enable the cover to stand by itself.

 |
| align as shown |
 |
| 5 layers |

17. Align the bottom edges of Pattern Pieces A, B and C with the line where your two fabrics join and mark around them, as shown.


19. Trim the bottom of your piece 6″ from the sewing line where the solid + print fabrics join. This is 13 1/4″ from the top of your piece, as shown.

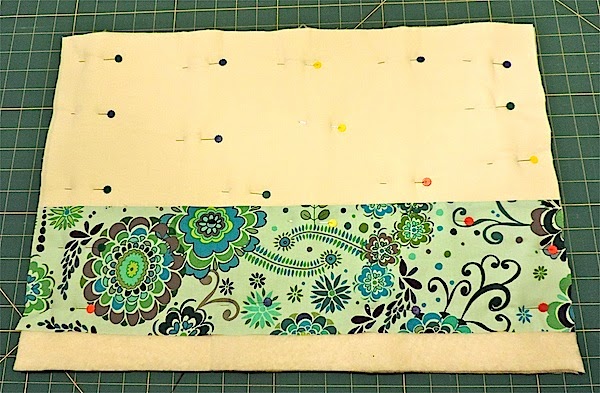
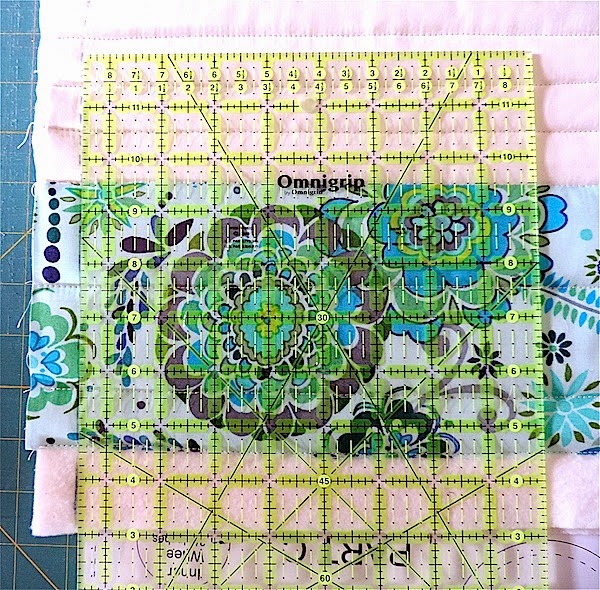
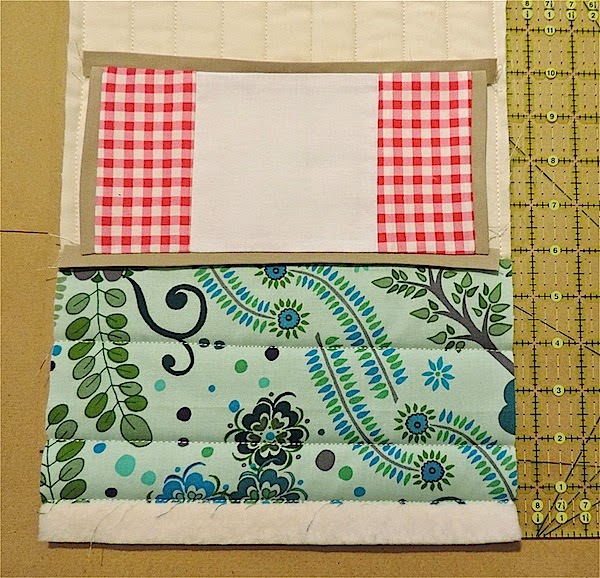
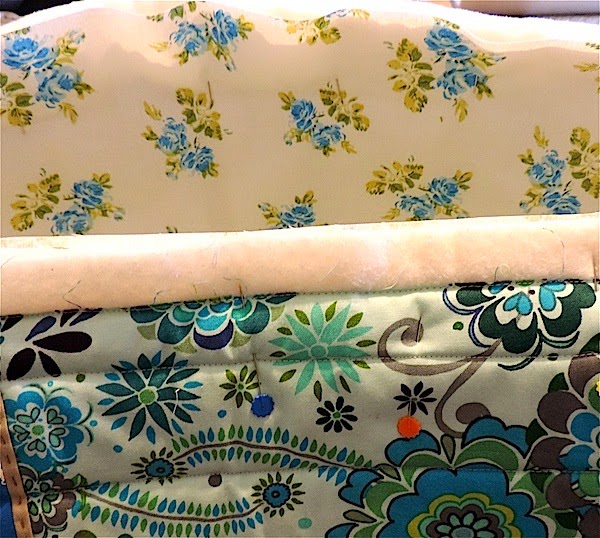
20. Make a quilt sandwich by layering the strip of backing fabric (44″ X 11″ – No. 7. above) right-side-down, then three strips of wadding (44″ X 11″ – No. 8. above) and, finally, your caravan solid fabric strip (32″ X 11″ – No. 9 above) right-side-up. Align the centre of the solid fabric strip with the centre of the wadding strip. Baste and quilt.
21. Mark the centre of your strip with pins. Measure 15 3/8″ from each side of the centre line and mark using pins, as shown. This gives your SEWING LINE.
20. Mark a line across your piece 1/4″ away from and on the exposed wadding side of your sewing line (indicated by pins), as shown. Then remove these pins.
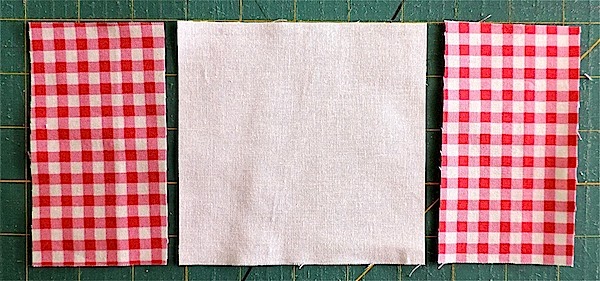
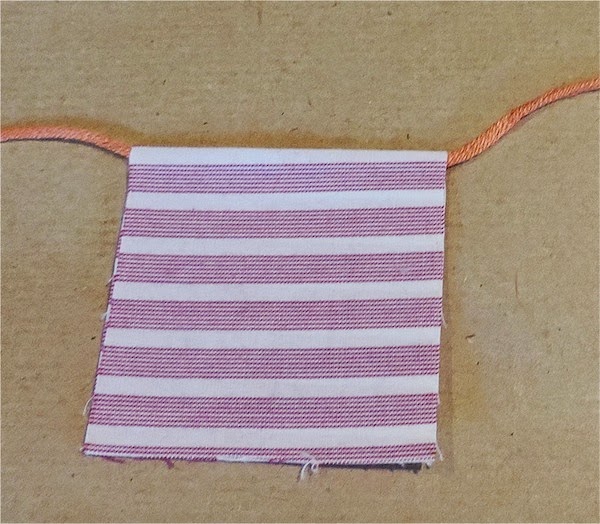
21. Take one caravan print fabric rectangle (5 1/2″ X 11″ – No.11. above) and lay it along your marked line (No. 20. above) wrong side up, as shown.

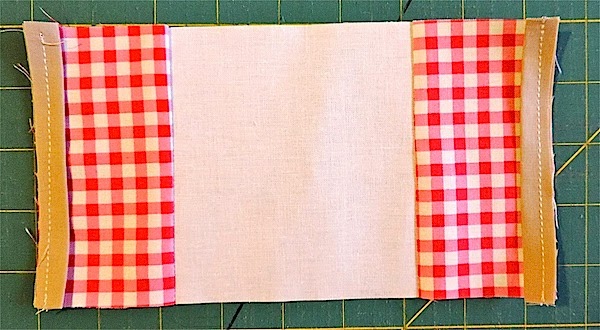
22. Pin and sew 1/4″ from edge, as shown.

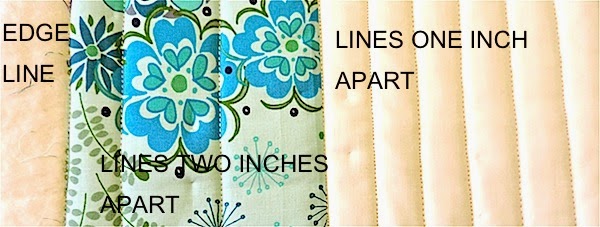
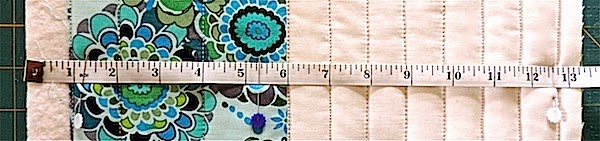
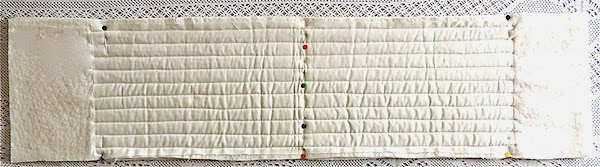
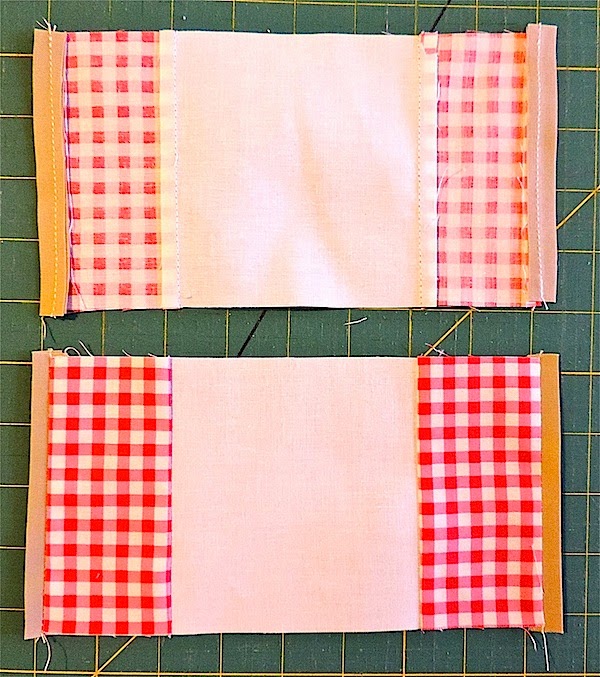
23. Flip the print fabric rectangle over. Press, Baste stitch in the ditch and quilt with lines 2″ apart.

Repeat Steps 20, 21, 22, 23, 24 for the opposite side of strip.
25. Trim sides of Strip to 9 1/2″ wide and set aside.

Set Aside.

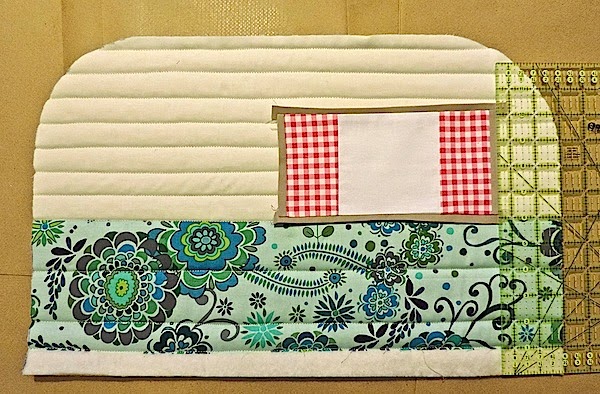
Cut the Window pieces using the templates on page 7 of your pattern and assemble as follows:
26. Take one Window Part 1 piece and two `window Part 2 pieces.
27. Join with 1/4″ seam and press seams away from centre, as shown.
 |
| front and back |
28. Take two Window Part 3 pieces and two Window Part 4 pieces. Fold lengthways and press.

29. Sew the Window Part 3 pieces to the Window Part 2 pieces with raw edges adjoining, as shown.

30. Press seams towards centre, as shown.
 |
| back and front |
31. Take two Window Part 2 pieces and sew to the top and bottom of window, as shown, ensuring you have a 1/4″ overlap at every side.
 |
| front and back |
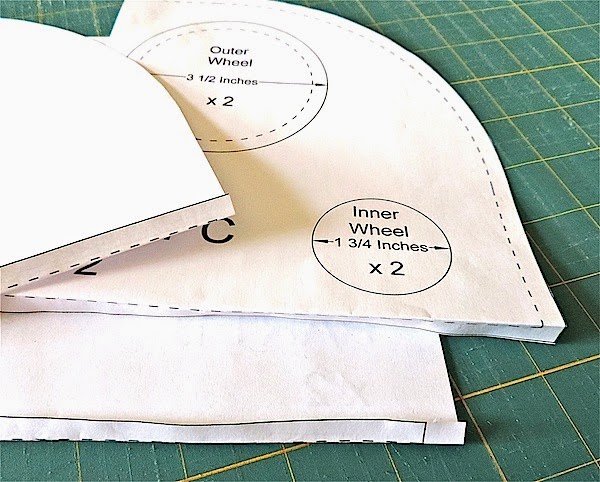
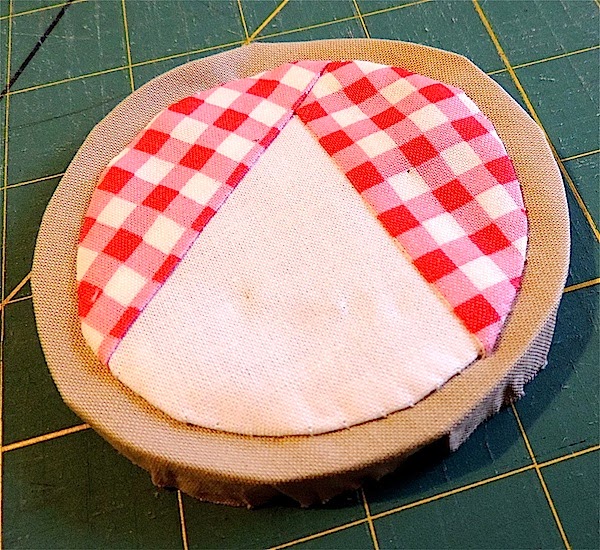
STAGE FOUR – THE ROUND WINDOW
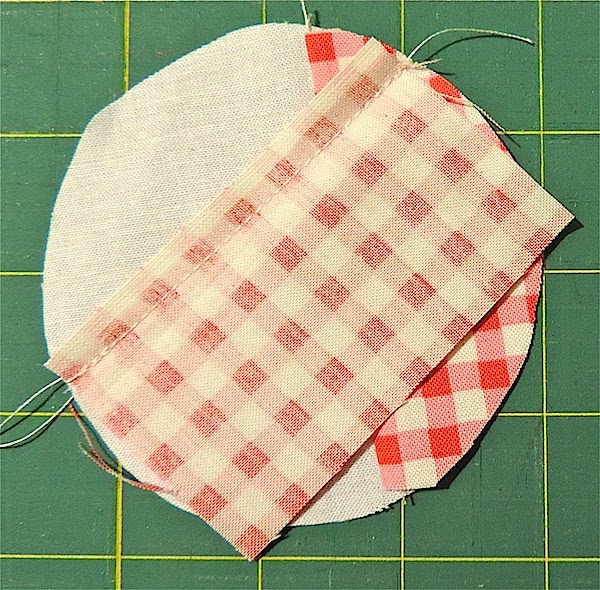
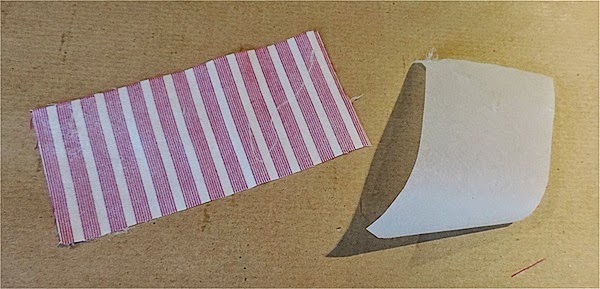
Cut the Round Window pieces using the templates on page 4 of your pattern and cut two rectangles of fabric 3 1/4″ X 2″. The larger circle will be the window frame and the smaller circle the ‘glass’. The rectangular pieces are curtains. Assemble as follows:
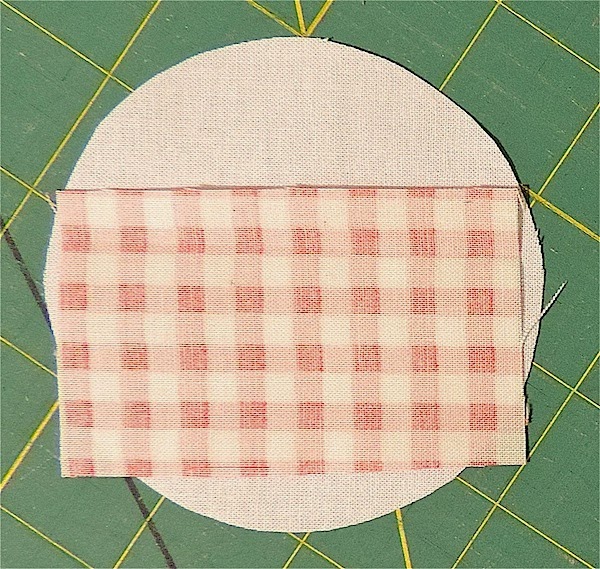
34. Sew with 1/4″ seam, as shown.

35. Flip over your rectangle and press, as shown.

36. Turn over and trim your rectangle to match the edge of the circle, as shown.
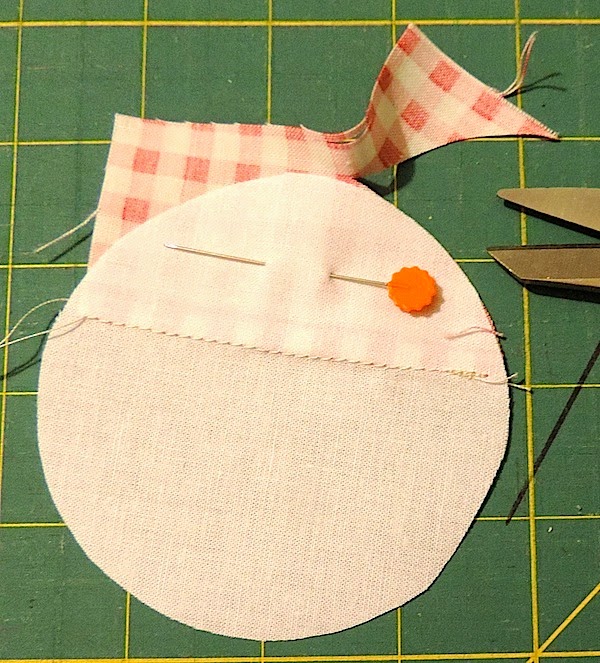
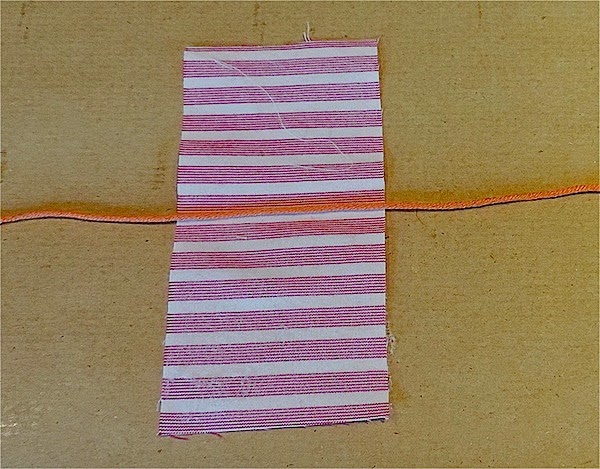
37. Take your second 3 1/4″ X 2″ rectangle and position it wrong side up. Position the rectangle so that one corner overlaps the piece sewn in step 34. above and one corner touches the edge of your circle, as shown.
38. Sew with 1/4″ seam, as shown.
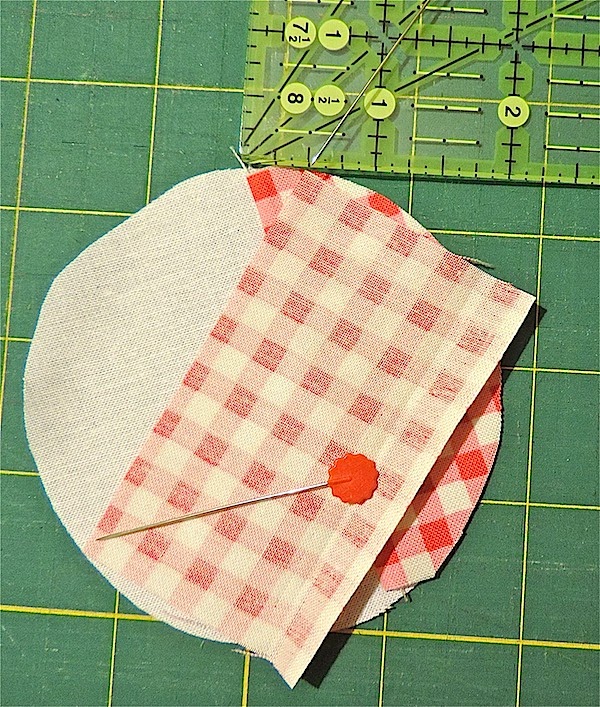
39. Repeat steps 35 and 36, as shown.
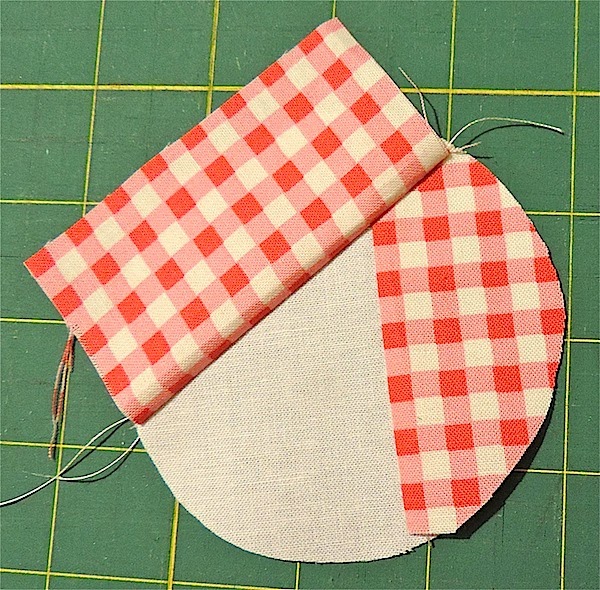
40. Trim away excess fabric from back, as shown, and set aside.

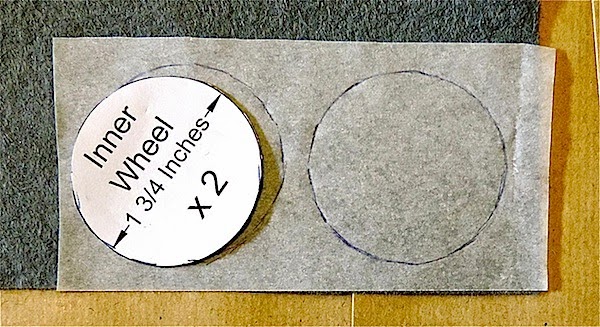
41. Go back to your Round Window paper pattern pieces. Cut off the seam allowance by cutting on the sewing line. Using these as templates, cut circles from card, as shown.
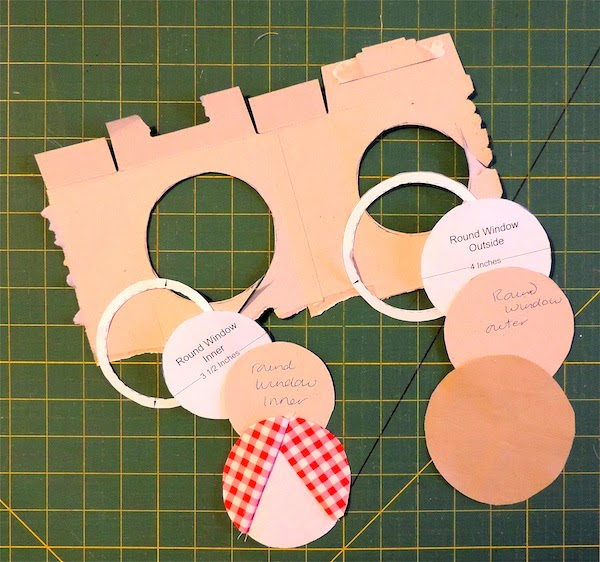
42. Take a piece of aluminium foil larger than your circles. Lay your Outer Window fabric circle on the foil wrong side up. Lay your Outer Window card circle on the centre of your fabric, as shown.

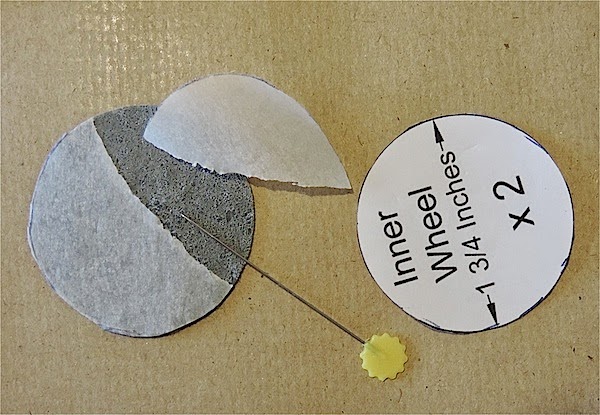
43. Carefully fold your foil tightly over the edges of the card circle – this is folding the fabric edges at the same time – and press.

44. Separate your foil, card and fabric carefully and set aside your fabric circle.

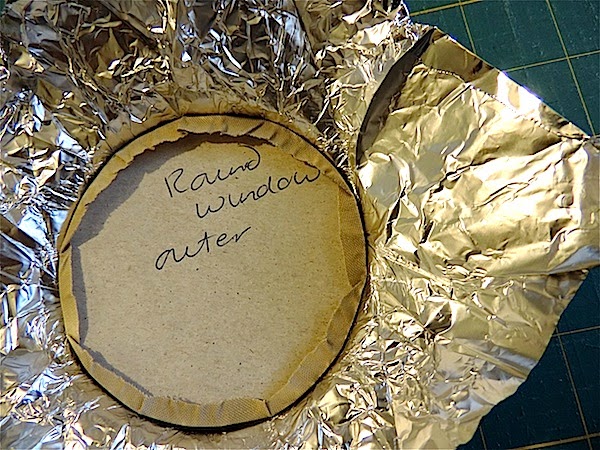
45. Repeat steps 42, 43 and 44 using your Inner Window piece from step 40.
46. Sew your Inner Window onto your Outer Window.
Set aside.

48. Press and attach Door Part 3 to Door in the same way as steps 30. and 31. above.


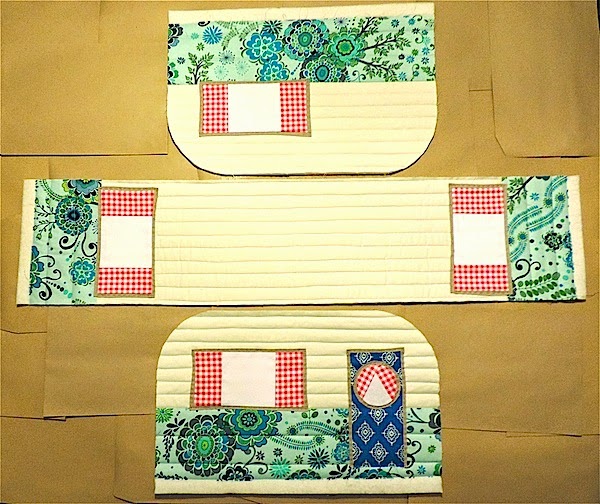
52. Take the remaining strip of your Caravan and position one window at each end. Position each window in the centre of the strip 5 3/4″ from the end, as shown.

 |
| USE PLENTY OF PINS |
 |
| BETWEEN YOUR STITCH IN THE DITCH LINES YOU CAN SEW ON YOUR FIRST QUILTING LINE |
 |
| SIDE ONE PINNED |
56. Attach the second side of your Caravan, repeating steps 54 and 55.
 |
| FIRST PIN BOTH ENDS |
 |
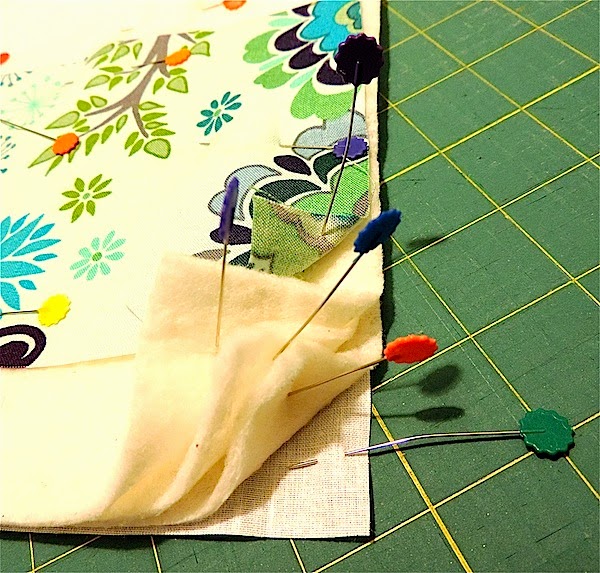
| SECURE THE CENTRE WITH PINS (THESE MAY NEED ADJUSTING LATER) |
 |
| MANHANDLE YOUR PIECE TO GET THE CORNERS TO LAY FLAT AGAINST THE CURVE |
 |
| SIDE TWO PINNED |
STAGE SEVEN – ATTACHING THE LINING AND THE
BOTTOM BACKGROUND
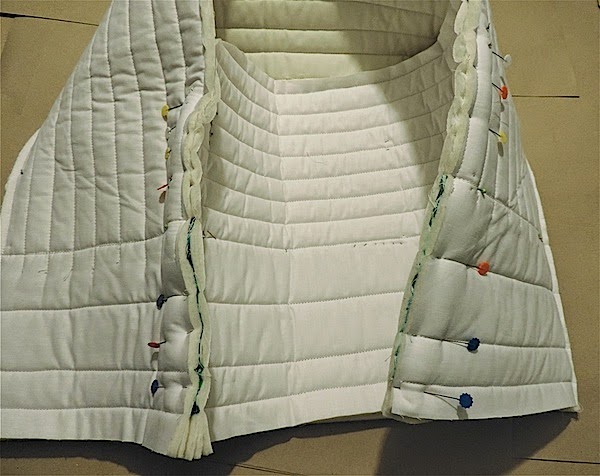
58. Position lining inside your cover and pin as shown and secure to the top corners of your cover with some small hand stitches.
59. Prepare a strip of background fabric 60″ X 5″ and press lengthwise. Fold over one end approx 1/4″ and press.
 |
| PLEASE PRETEND THIS STRIP IS ALL GREEN! |
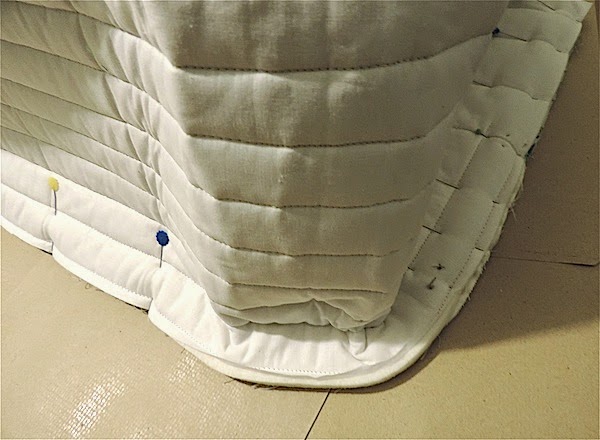
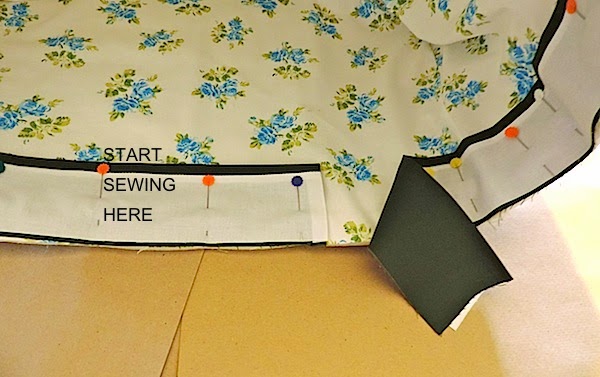
60. Align your background strip with the bottom of your lining, raw edges together, and pin in place. Work clockwise beginning with your folded end.
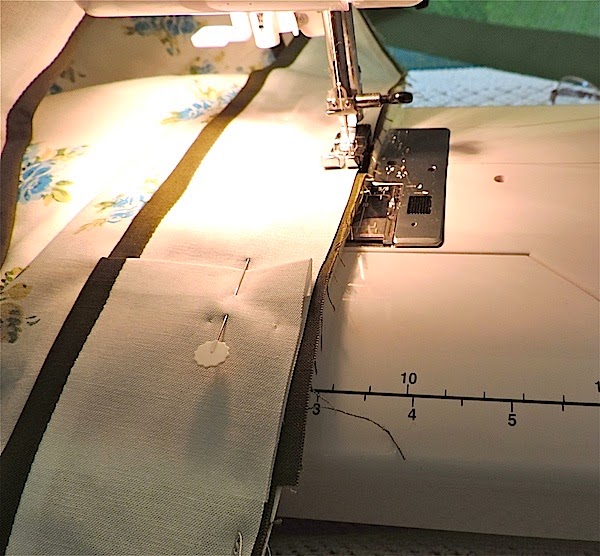
61. Starting about 4″ from your folded end, sew with a 1/4″ seam until you get to about 4″ from your folded end, as shown.
61. Unpin your folded end. Lay your raw edged end inside the folded end, as shown.

62. Continuing sewing until your strip is secured right around.

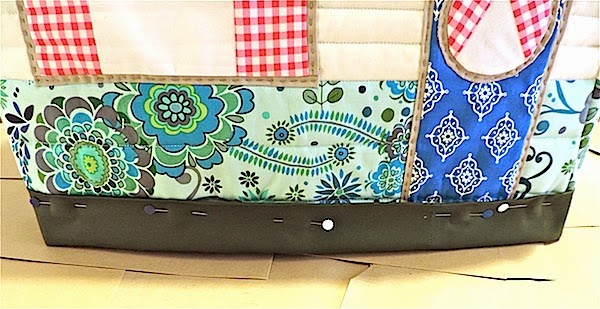
63. Fold your strip to the right side of your cover. Pin and slip stitch to right side just above your second quilting line, as shown.
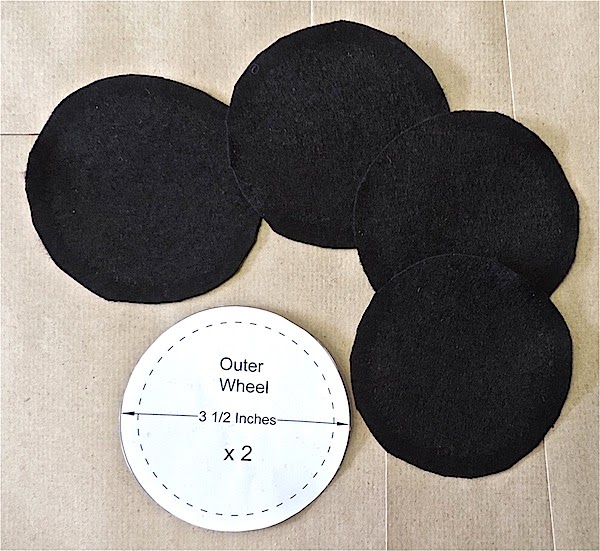
STAGE EIGHT – THE WHEELS


THE END!

Vera
Such a fun and cute cover! Love those funky details.
LikeLike
Benta AtSLIKstitches
I can't see that I would ever put a cover on mine. , but I am wondering if I could make a bag instead !!!! PS a visitor saw my / ( your ) Hexie today, and it was much admired, thank you again !!!!
LikeLike
M-R Charbonneau
This is awesome, Janine! Congratulations!
LikeLike
Catherine
It is totally brilliant and your photos of it are fab. Good luck for your new career as pattern designer:-)
LikeLike
Susan at TheBoredZombie.com
Really really really (is that enough reallys?) fantastic. I love the cover and I love the instructions! I don't have time to try myself right now, but can't wait to see what everyone else comes up with.
LikeLike
Marti Dyer-Allison
I would strongly suggest “Soft and Stable” from ByAnnie (https://www.byannie.com/shop/category/supplies-and-tools/byannies-soft-and-stable/) as a lining, rather than layers of batting/wadding. I use something called “headliner fabric” that is used to cover the top inside of automobiles (much cheaper!). It will make your cover stand up nicely, and it's easier to sew through than layers of batting!
LikeLike
Jess @ Elven Garden Quilts
That is absolutely brilliant Janine! I will definitely be making one when I get a chance (hopefully soon, I absolutely love this!)
LikeLike
Kim
Amazing!! What a brilliant tutorial, Janine. What a herculean effort on your part to put all of this together. Gorgeous photos and excellent step by step instructions. You may now take a bow!!
LikeLike
Teresa Connolly
Amazing tutorial, photos and instructions really fabulous.
LikeLike
A Quilter's Mission
Thank you Janine! Great tut for sure. Very clear and understandable.
LikeLike
nerospost
Hi Janine! This is so Super Extra Sweet Cute!!! The best ever sewing machine cover! Thank you for sharing how you made it! Have a lovely week! x Teje
nerospost(at)gmail(dot)com
LikeLike
DeborahGun
so brilliant Janine. Thanks so much for sharing. I have no time at the moment, but definitely would like to make one soon :-)
LikeLike
junacreationsuk.blogspot.co.uk
You bl**dy wonderful person you… I have bought my pattern and will start on it as soon as I get a bit of free time – probably after my craft fair…. Brilliant, thank you.
LikeLike
Lea
Picked up the pattern today, THANKS! I can't wait to get one completed. The spring/summer is such a BUSY time of year though, so I will send pics once completed. This is such a FUN design.
LikeLike
Soma Acharya
Yay!! I won't be able to sew this for a while, but I am going to Etsy right now to get the pattern. Thank you for the fabulous tutorial, Janine :)
-Soma
LikeLike
Jodi B.
Janine,
I was going to suggest Soft and Stable, but looks like someone else made the same suggestion. I only have black on hand, but I'll try the pattern using that. I can't wait to try it!
LikeLike
Karen
You are so sweet for putting this together! I'm going to try this!! :)
LikeLike
Lea
This is just too cute! Thank you for sharing.
LikeLike
Anita
Very cute! Thanks for the tutorial!
LikeLike
Archie the wonder dog
What a wonderful idea – I love it!!
LikeLike
Sandy W
absolutely adorable!!
LikeLike
Razzle Dazzle Quilter
I have a friend who has just purchased a vintage caravan. I've been trying to think of something to make for her caravan (which is going to be her sewing room when shes on holiday) this will be perfect. Thank you!
Linda
LikeLike
Celtic Thistle
I love this Janine, I am hoping to upgrade my sewing machine soon, so might have to make one of these when I do :)
LikeLike
katyquilts
This is so stinkin' cute! I never really wanted a cover for my machine but this is awesome. I might just change my mind!
LikeLike
Laura
Amazing. Trend setter!
LikeLike
Erin @ Missy Mac Creations
This is so adorable Janine. Love it!
LikeLike
Willit Neverend
This looks great. I love seeing it out on the grass. It looks like a real caravan, ready to be taken on a trip, maybe by a family of elves :)
LikeLike
Cindy Dahlgren
Wonderful pattern. Did you know you can offer patterns on Craftsy for free or for fee? I don't believe it takes much to set it up either. I can't make this now, but would really love to. It's absolutely perfect!
LikeLike
Marny
Cuter than cute! Smart, clever, creative, amazing. Love it!
Now that I've put your tutorial on my Word (down to 22 pages because I shrank/shrunk the photos) how much is the pattern?
I'm thinking (even while knowing Heck will freeze over before I can make this) of how to utilize this when my Singer floor model is closed. Perhaps a cover for a box with sewing tools.
LikeLike
Marny
Oops … can't edit, so here's an after-thought: I have already posted your URL to the online Quilting101 group.
LikeLike
patchcath
Superbe et explications fabuleuses. Très grand merci
LikeLike
Claire
just found you via quiltville, have shared on my shop fb page, amazing tutorial, thank you for sharing x
LikeLike
Susan Walker
Saw this on facebook. Would this pattern be available to teach to a class in a quilt shop?
LikeLike
Karen B.
Bought and downloaded pattern. Can't wait to get started!!
LikeLike
Debbie
Thanks for sharing your creative ideas!!! I am in the process of making a quilt with vintage trailers on it. I'll send you pics when I'm done!!! Thanks again!!
LikeLike
Kel
I love this, I have three siblings who camp, but don't sew. So, I'm going to try to make these for the toasters they keep in their campers.
LikeLike
Louise Marie
i love it! Camping is one of my favorite things to do. . . .next to sewing. So this is perfect for me. Thank you.
LikeLike
Louise Miller
This is amazing! Very cute and thank you for sharing x
LikeLike
Decor To Adore
Love this and can't wait to make it!
LikeLike
McStamper
This is absolutely the cutest!! Thanks so much for the instructions.
LikeLike
Joan
Love it! I'm going to make a cover for my little sewing machine that I use in my camper. Thank you for sharing this cute project.
LikeLike
Brynwood Needleworks
I agree with Marti: A layer of Soft & Stable (Option One), or perhaps (Option Two) fabric, regular batting (wadding) and an additional layer of canvas (I use new, washed painter's drop cloths) would give you the stability you seek without all the layers. I have sewn S & S, fabric AND canvas, which is difficult, but not impossible to sew. I would think one or the other option would be sufficient. Your cover is adorable, and as we travel in an Airstream all summer, I'm sure I'll be making one for at least one of my machines! Thanks for the great tutorial!
LikeLike
Kerrie Erb
I am coming to this party late, but this is totally stinking awesome!
Found it on pinterest! ;)
When I have time to sew for me, this will be it!!
Thanks!
LikeLike
Cindy Dahlgren
Love this! Did you try using Soft and Stable instead of all the other layers? It works really well. Dahlgren0609 at Gmail dot com
LikeLike
Kathi Riemer
What an adorable sewing machine cover…where did you get such a fun idea? Pinned!
LikeLike
Vickie For Finely Fabricated
Thank you for the tutorial. You can use fusible batting and not put it in the seam allowances.
LikeLike
Jeri Niksich
I have sent you several messages any way I can, so here is one more, I love this as we have an RV and I would love to make this cover for my small machine I take. We will be camping over the Thanksgiving holidays & in case it gets cold I plan on sewing inside. I copied the instruction you gave but would like the pattern as well but I don't want to use PayPal to pay for it. Will you be willing to take a check or money order for the pattern. Don't like the interest rate on PayPal is the reason i ask. Thanks with any help you can offer me.
Jeri oldtisme@aol.com.
LikeLike
jane
I'm definitely doing this! What a fab tutorial instructions were so clear thanks for sharing!! X
LikeLike
A.J. Dub. (Amy)
I agree with the Soft and Stable suggestion for ease and stand-up-ablity. It is fabulous stuff.
LikeLike
Janet Ward
Thank you for this awesome pattern, I really needed a pattern I liked for my machines, and this is it… Totally adorable!. Blessings sent to you! ☺
LikeLike