


This post is adapted from the Tutorial which accompanies my Basic Jointed Cloth Doll Pattern. I’m posting it here because the techniques used are readily transferable to many patterns for dolls and softies (although some patterns will have some pieces that will have to be cut with a seam allowance and sewn in the traditional way). Although I’ve been delighted to receive compliments about sewing tiny dolls, I’m really hoping to show that for general sewists and quilters the step from 2D to 3D isn’t as big as many people suppose and, given a pair of hemostats and an open toe foot, toy making can be fun and very manageable :)

G – A longish darning needle or doll needle.
H – Very strong thread/yarn for jointing.
K- Sewing thread.
L – Pins (glass/bead head recommended).
A Sewing Machine (not shown).
If you are not using my pattern, skip this section (in blue) and go straight to ‘MAKING YOUR DOLL’.


If you are using this pattern to make the larger GRANNY SQUARE, KNIT and PURL dolls print:
GRANNY SQUARE – ‘Scale 110%’
KNIT at ‘Scale 100%’
PURL at ‘Scale 90%’
If you are using this pattern to make the 1:12 dolls house sized GRANNY SQUARE, KNIT and PURL dolls print:
GRANNY SQUARE – ‘Scale 55%’
KNIT at ‘Scale 50%’
PURL at ‘Scale 45%’
1. Cut out your pattern pieces using paper scissors. If you are making more than one size of doll. it is helpful to write the scale on your pattern pieces.
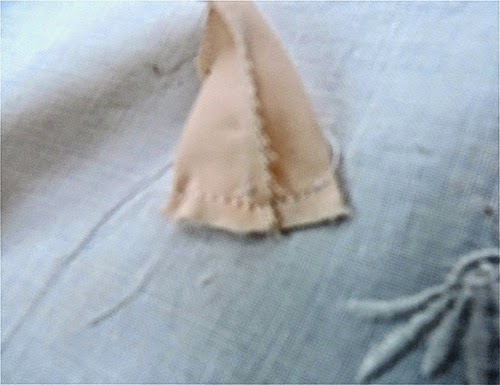
3. For any body parts that require two identical pieces to be sewn together, draw around the SEWING LINE on your pattern pieces using a pencil or a vanishing pen marking where you need to leave openings for turning.
 |
| I have placed pins to hold the fold in place |
4. Sew over your pencil/pen markings on the SEWING LINE only. Use a short stitch length (1 1/2 – 2 recommended) and reverse stitch at the beginning and end of each line. Take care to sew on the line. On the tighter curves, you may find it helps to shorten your stitch length and sew very slowly.


5. Cut out your pieces. Cut approx 1/8″ from your SEWING LINE or 1/4″ if you are intending your doll to be a child’s toy. Cut 1/4″-1/2″ away from your dotted lines – the places you have left open. If you have used a vanishing marker vanish your lines after cutting out.


6. Align the seams on the top and bottom of each foot and pin. Sew across the foot in a slight curve, as shown.
 |
| apologies for the blur in this photo |

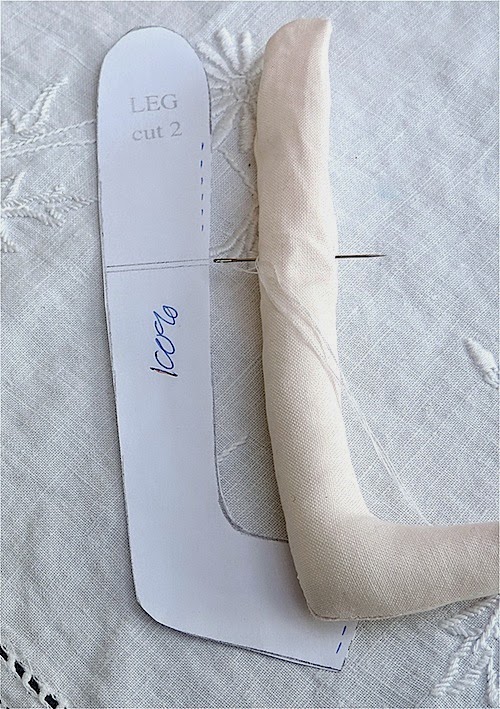
7. Use your hemostats to turn your pieces right-side-out. Push the Hemostats into your piece, grab hold of some fabric, lock your handles and wiggle and pull. On very small pieces this is a bit fiddly but once you get the hang of using the hemostats you’ll find they let you turn even very tiny pieces through small openings. The following photos demonstrate with a leg piece:
 |
| insert your hemostats, grab the toe and lock your handles |
 |
| pull through the opening |
 |
| repeat with top of leg |
 |
| insert your hemostats back into the leg and push the piece into shape |
8. Stuff the body very firmly. You will probably be surprised at how much stuffing this takes! To avoid lumpiness, use your hemostats and feed your stuffing into the piece in a single long line. Keep stuffing until the body and neck stump are as full as possible. This piece needs to be very firm for the button joints to work well. Hand sew across the neck stump opening.


9. Stuff the head very firmly (as in step 8, above) and stuff the neck lightly.

10. Turn under approximately half of the neck edge (the actual measurement will vary depending on what size doll you are making).

11. Pull the neck over the neck stump as far as possible and pin. This is tricky to start with but gets easier as you proceed. You may need to go around the neck several time pulling the neck edge down tighter with your hemostats and repositioning the pins.
 |
| 1 |
 |
| 2 |
 |
| 4 |
 |
| 3 |
12. Slip stitch the neck edge onto the neck stump turning the neck edge under as you go. Your stitches will pull the neck down. If the head doesn’t feel completely secure use your hemostats to add more stuffing before you complete your slip stitching. I recommend you then slip stitch or ladder stitch round another time to pull the head down a little further.


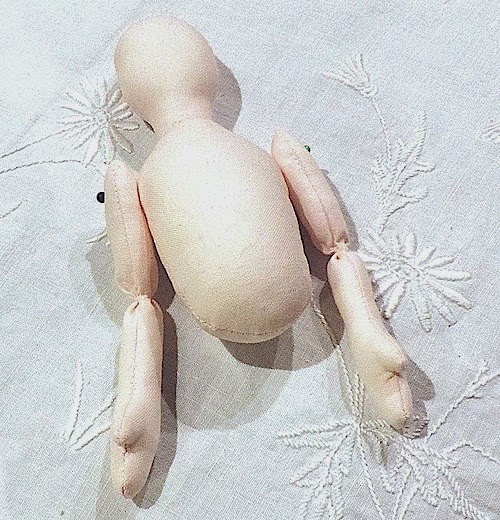
13. Now move onto the arms and legs. Stuff the hands and feet reasonably firmly. Stuff the lower arms and legs less firmly, stopping before your tying lines. Take care to stuff each limb the same amount as its partner. The place to stop stuffing will vary depending on the size of your doll. Use your pattern pieces as a guide to position the tying lines. If you hold the limb at the tying line the lower limb should be able to swing freely, as shown.

14. To make the elbow and knee joints, secure a piece of strong thread to the back of the joint. take your needle through to the front of the joint and back again two or three times.
15. Wrap your thread around the joint two or three times and fasten off.

16. Stuff the tops of your arm and leg pieces. Stuff very firmly at the top (shoulders/hips) and less firmly as you work down towards the elbows and knees. Stop stuffing before the joint stops moving freely.
17. Slip stitch the openings closed.
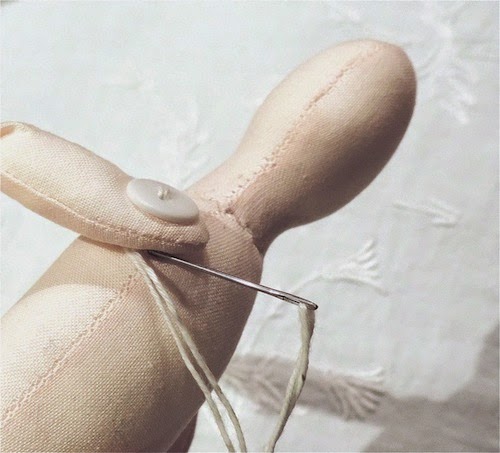
18. Secure the arms to the upper body using buttons and strong thread.
 |
| pin to find a position you like |
 |
| Draw thread through button. arm, body, arm, button. Work back and forth several times. |
 |
| secure thread and bury the end in the arm |
19. Secure the legs to the lower body using buttons and strong thread in the same way that you joined the arms.


A Quilter's Mission
How fun to see how in the world you make these cutie pies! Thank you so very much for sharing all the details.
LikeLike
Willit Neverend
It looks like a lot of love goes into making these dolls.
LikeLike
Soma Acharya
Great tutorial, Janine!! Thank you for writing this. I was always very curious as to the how you create your dolls. I am pinning this for later :)
-Soma
LikeLike
Benta AtSLIKstitches
Thanks for making that seem far less scary than I expected! It may never happen, but I've added it to my “I want to try” list!
LikeLike
Teresa Connolly
Thank you for showing your cute doll tutorial Janine and I have never heard of hemostats they would be very handy to use :)
LikeLike
Mara
So very interesting, all of those little pieces, I have tried turning small pieces and it is hard, I need to find a pair of hemostats!
LikeLike
Kim
Amazing tutorial. You have thought of everything to simplify the making process of your cute as cute dolls! I had never heard of hemostats either…..they certainly do seem to make tiny doll making so much easier! Thank you for sharing all the little details, Janine!
LikeLike
Karen
Great tutorial! The possibilities are endless with these, so cute!
LikeLike
Archie the wonder dog
So that's how you make them!!
LikeLike
Betsey Mann
This was great, just what I was looking for, thank you. Have you ever put the button between the arm and the body? Do you think it would work? I wondered if you could do one where the buttons wouldn’t “show”?
LikeLike
Janine @ Rainbow Hare
Thank you, Betsey. I’m not sure about having a button between the arm and the body. You can do it without a button at all (which is less noticeable but still shows) but I don’t think it would work unless your thread passes right through to the outside of the arm and is pulled quite taut. Otherwise, you could just stitch the inside of the arm to the body but it wouldn’t move in the same way…If you find a solution, please let me know and I’ll try it out, Best Wishes, Janine :)
LikeLike
Disne Sorsno
I got this from my daughter on my phone. I tried to get it on u tube but coildnt, But i liked what i saw. I make cloth dolls but have a terrible time stuffing , dovthe head and neck fine. But the cbottom of the neck into the body , I cannot keep it from wrinkleing. Is there anything.I can do
LikeLike
Janine @ Rainbow Hare
Hi, Disne, I’m sorry the youtube video seems to be no longer available. The main points were to stretch the stuffing into a line and feed it into the doll in a continuous piece – not to push in one piece then another – and to stuff firmly. The lady in the tute used a stuffing fork but I use haemostats. I think wrinkles come from having too little stuffing in that area. If I make the head and body separately (like in my tute) when I sew the head to the body, I sew part way and keep adding more stuffing. Then I sew around another time about 1/4″ from my first round of sewing using a ladder stitch and pulling tightly, Janine.
LikeLike