


A Version 1 pattern for my Vintage Caravan Sewing Machine Cover is now available.

I am hoping to release the final version for sale, together with these instructions, in a few weeks but, in the meantime, you can download it for 50p The final version has been released and now costs £4.00 in my Etsy Shop. I had planned to offer it free but I discovered when I came to list it that Etsy doesn’t allow that. This pattern has not yet been tested, except by me in the making of this tutorial, so This pattern has now been made by a large number of independent sewists so I’m confident everything should go smoothly but if you come across anything that doesn’t make sense or doesn’t work as expected please contact me and we will try to resolve it.
The basic construction is very simple but to enable the finished cover to be free standing I have used three layers of Hobbs Fusible Wadding. This means there is a LOT of thickness to sew through. A walking foot is essential and I strongly recommend that before you begin you test the viability of sewing through six layers of wadding + four layers of fabric on your machine. I have Janome Sewist 525S and it was possible but not easy.
If you find the thickness too much, you can (a) use two layers of wadding, (b) use wadding + a layer of heavy duty interfacing and/or (c) reinforce your main structure with further wadding or interfacing after you have completed Stage Six.
I would very much appreciate any suggestions for improving stitchability without compromising sturdiness or, indeed, any other feedback you may have.
Please leave your email address or a link to a social networking site where I can contact you if you leave a comment or question unless you are absolutely 100% certain you are not a noreply blogger.


VINTAGE CARAVAN SEWING MACHINE COVER TUTORIAL
(For information on adjusting the sizing, please click here)

(Measurements here are intended to give an indication only. Accurate sizes and cutting instructions are given below)
Wadding – 44″ X 90″
Wheel Hub Fabric – 5″ X 2 1/2 ” grey felt
Length of yarn – 56″
Double Sided Fusible Fabric – 36″ X 4″ + 5″ X 2 1/2 ”
Aluminium Foil – Approx 8″ X4″
Two Buttons to back Wheel Buttons
Paper Scissors
I recommend beginning with the lining because it acts as a rehearsal for sewing the final pieces without having to worry about the thickness of all the layers and because you can use it to make sure the cover will actually cover your machine comfortably.
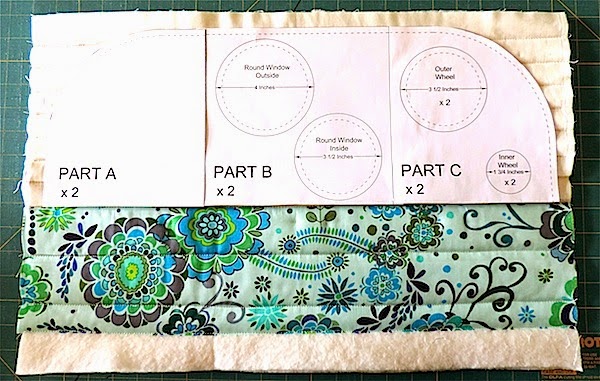
3. Align pattern pieces A, B and C with the side and top edges of the rectangles you cut in step 2 (above) and cut curve as illustrated below.


4. Mark the centre of each main piece and the strip with pins, as illustrated below.

5. With right sides together, align the pins of one main piece with the pin on one side of the strip and, beginning at the centre point pin and sew.

6. Repeat with the other side. Do not turn right-side-out. Press and set aside.
Please note that the fabrics in this stage are cut larger than the pattern pieces indicate to allow for any shrinkage/distortion when the layers are quilted so you can go a little into your selvedges as long as you remember to cut them off later.
The main body of the caravan is very thick to enable the cover to stand by itself.
 |
| align as shown |
 |
| 5 layers |

17. Align the bottom edges of Pattern Pieces A, B and C with the line where your two fabrics join and mark around them, as shown.


19. Trim the bottom of your piece 6″ from the sewing line where the solid + print fabrics join. This is 13 1/4″ from the top of your piece, as shown.
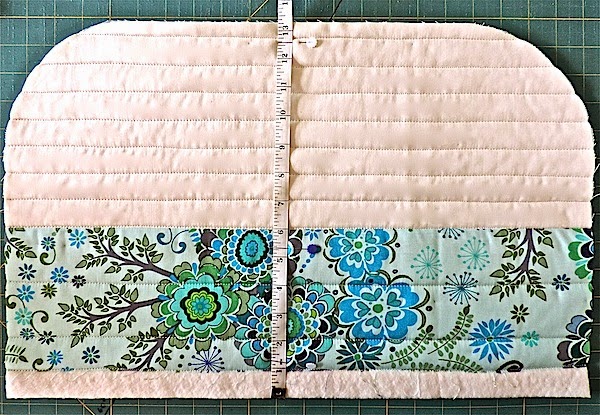

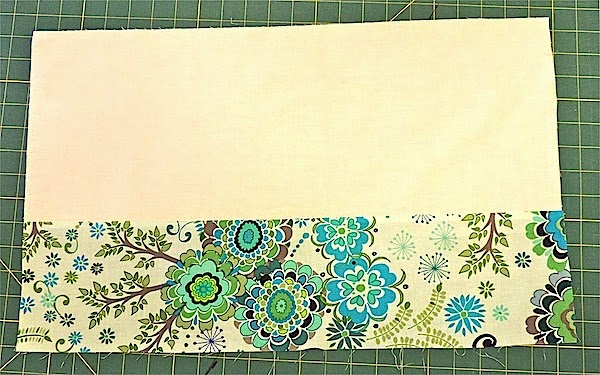
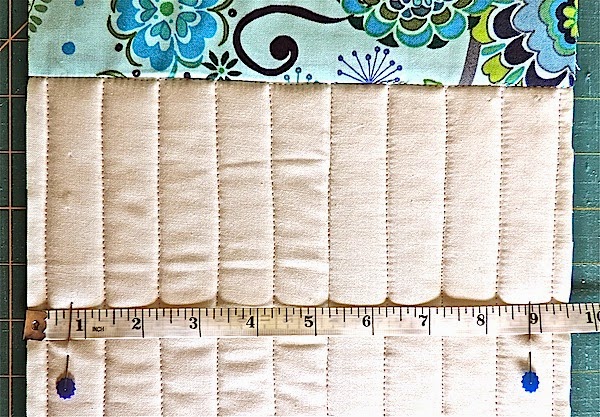
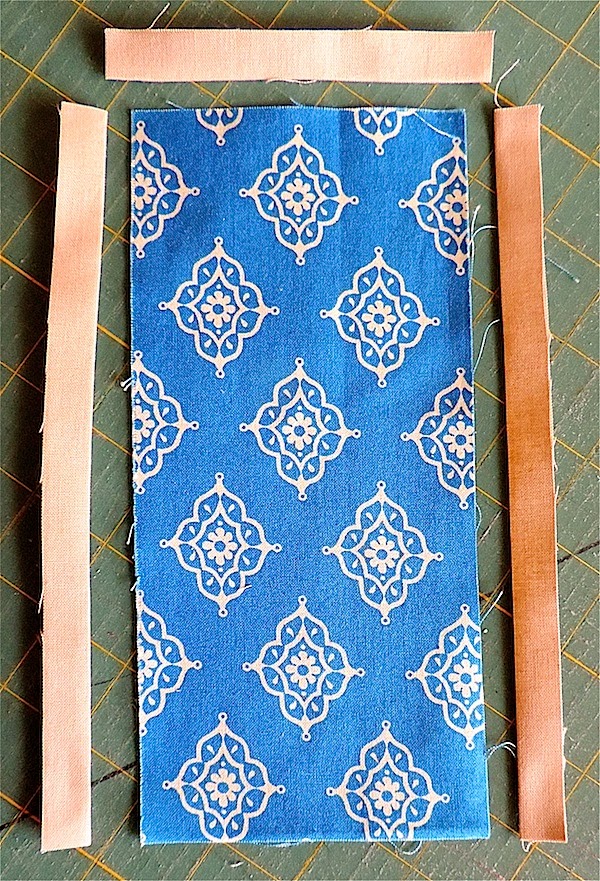
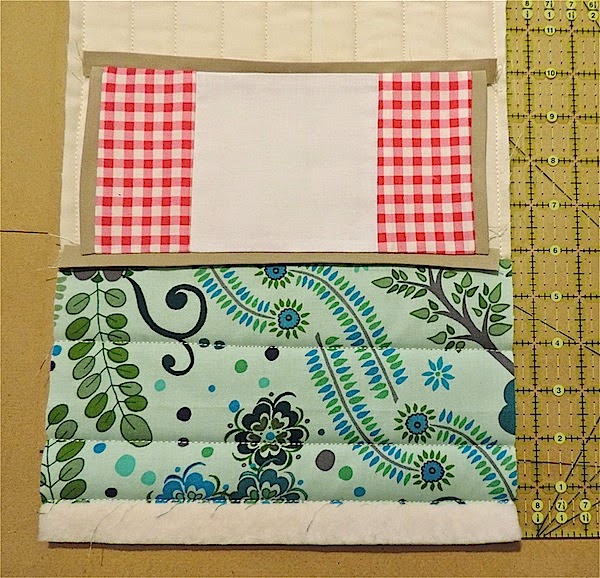
20. Make a quilt sandwich by layering the strip of backing fabric (44″ X 11″ – No. 7. above) right-side-down, then three strips of wadding (44″ X 11″ – No. 8. above) and, finally, your caravan solid fabric strip (32″ X 11″ – No. 9 above) right-side-up. Align the centre of the solid fabric strip with the centre of the wadding strip. Baste and quilt.
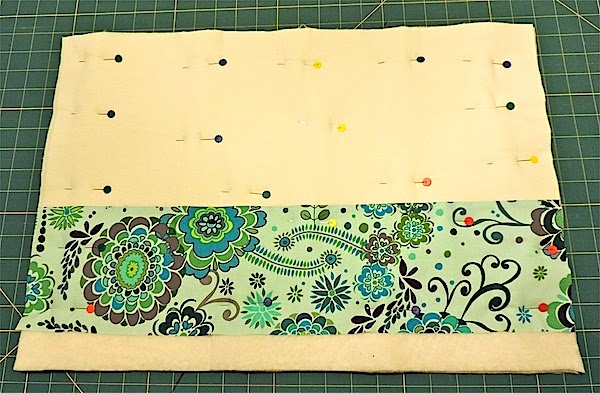
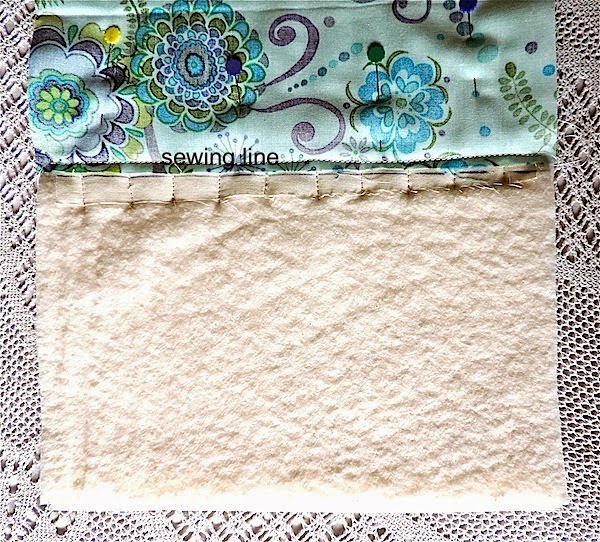
21. Mark the centre of your strip with pins. Measure 15 3/8″ from each side of the centre line and mark using pins, as shown. This gives your SEWING LINE.

20. Mark a line across your piece 1/4″ away from and on the exposed wadding side of your sewing line (indicated by pins), as shown. Then remove these pins.

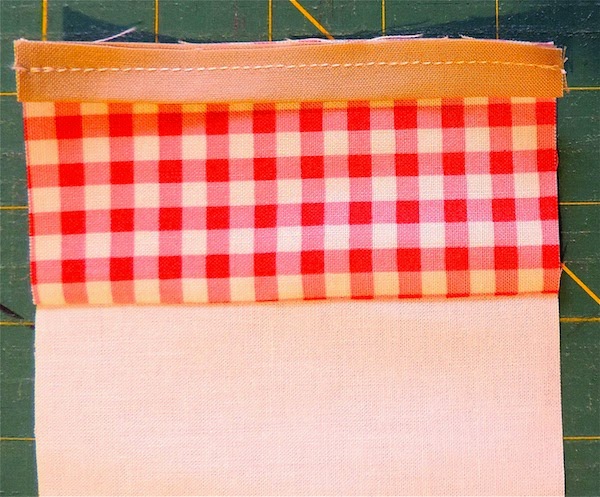
21. Take one caravan print fabric rectangle (5 1/2″ X 11″ – No.11. above) and lay it along your marked line (No. 20. above) wrong side up, as shown.

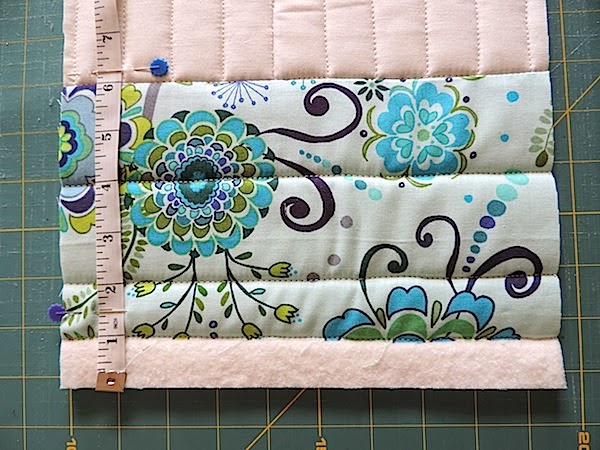
22. Pin and sew 1/4″ from edge, as shown.
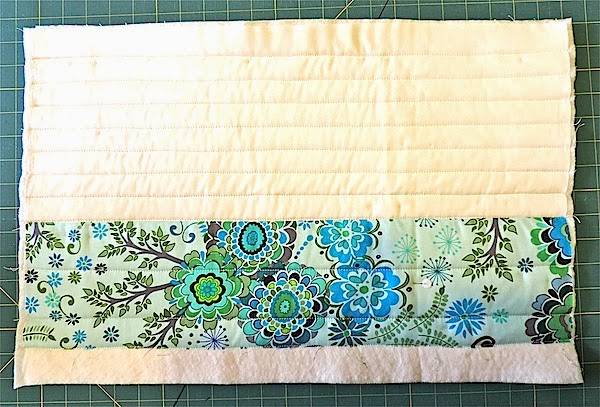
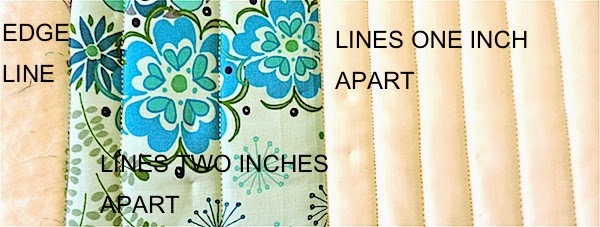
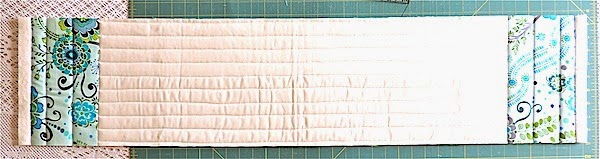
23. Flip the print fabric rectangle over. Press, Baste stitch in the ditch and quilt with lines 2″ apart.
Repeat Steps 20, 21, 22, 23, 24 for the opposite side of strip.
25. Trim sides of Strip to 9 1/2″ wide and set aside.
Set Aside.
Cut the Window pieces using the templates on page 7 of your pattern and assemble as follows:
26. Take one Window Part 1 piece and two `window Part 2 pieces.
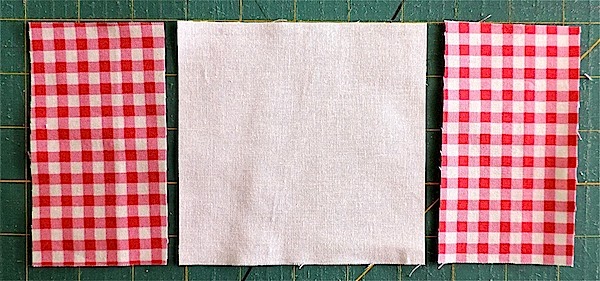
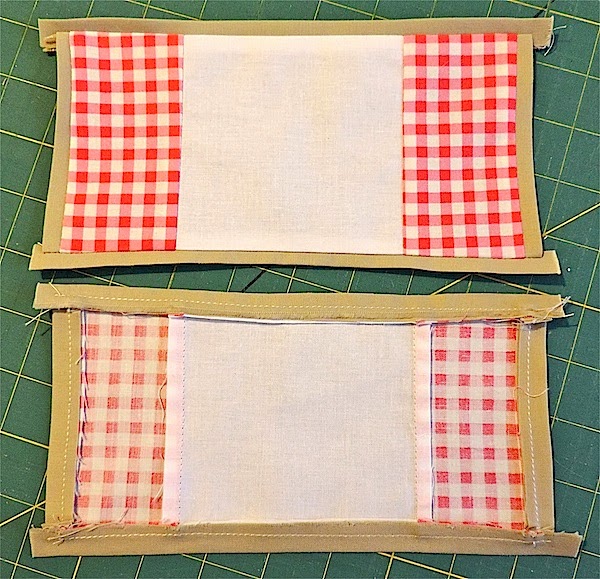
27. Join with 1/4″ seam and press seams away from centre, as shown.
 |
| front and back |
28. Take two Window Part 3 pieces and two Window Part 4 pieces. Fold lengthways and press.

29. Sew the Window Part 3 pieces to the Window Part 2 pieces with raw edges adjoining, as shown.
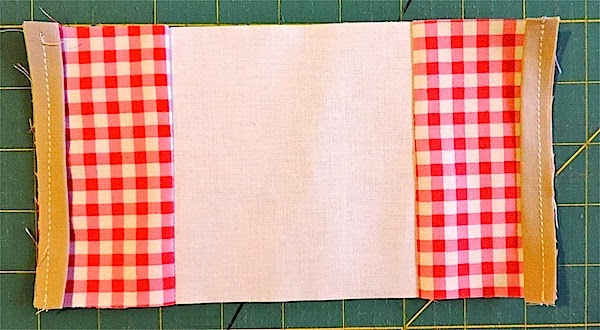
30. Press seams towards centre, as shown.
 |
| back and front |
31. Take two Window Part 2 pieces and sew to the top and bottom of window, as shown, ensuring you have a 1/4″ overlap at every side.

 |
| front and back |
STAGE FOUR – THE ROUND WINDOW
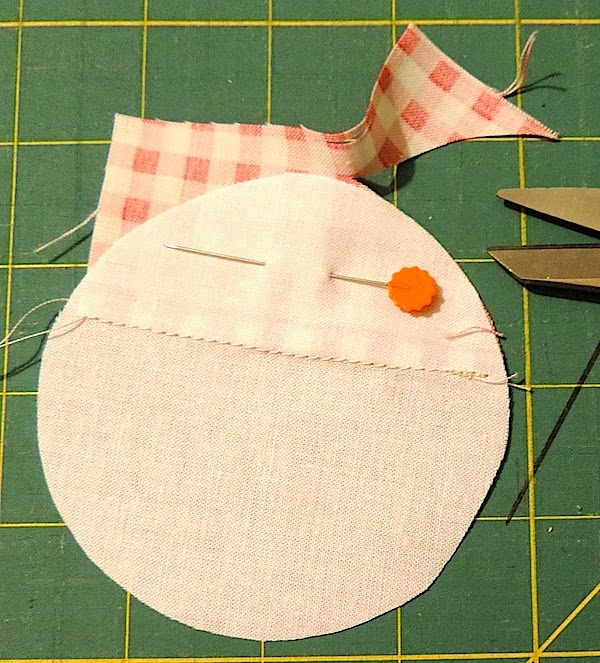
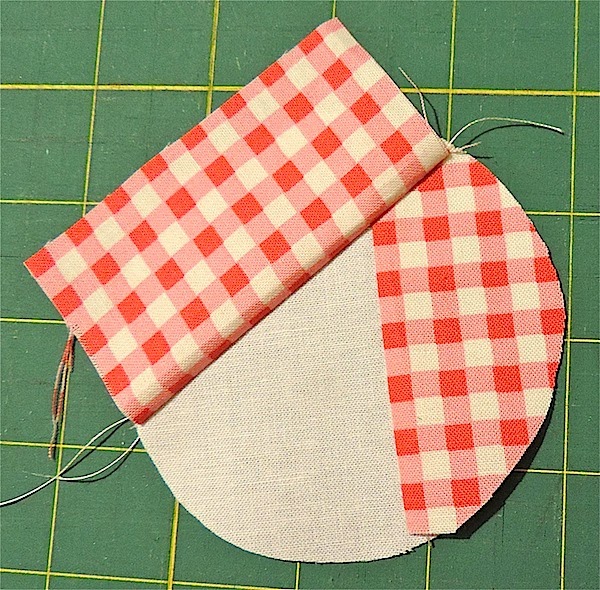
Cut the Round Window pieces using the templates on page 4 of your pattern and cut two rectangles of fabric 3 1/4″ X 2″. The larger circle will be the window frame and the smaller circle the ‘glass’. The rectangular pieces are curtains. Assemble as follows:

34. Sew with 1/4″ seam, as shown.

35. Flip over your rectangle and press, as shown.

36. Turn over and trim your rectangle to match the edge of the circle, as shown.
37. Take your second 3 1/4″ X 2″ rectangle and position it wrong side up. Position the rectangle so that one corner overlaps the piece sewn in step 34. above and one corner touches the edge of your circle, as shown.
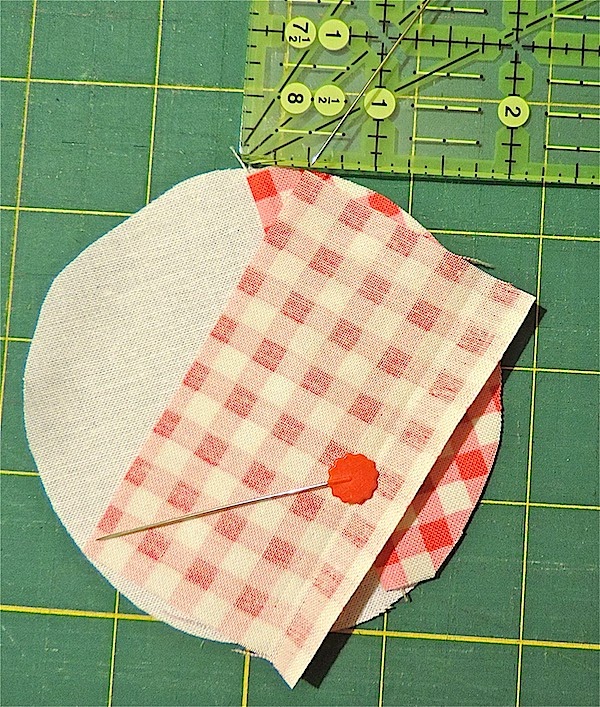
38. Sew with 1/4″ seam, as shown.

39. Repeat steps 35 and 36, as shown.
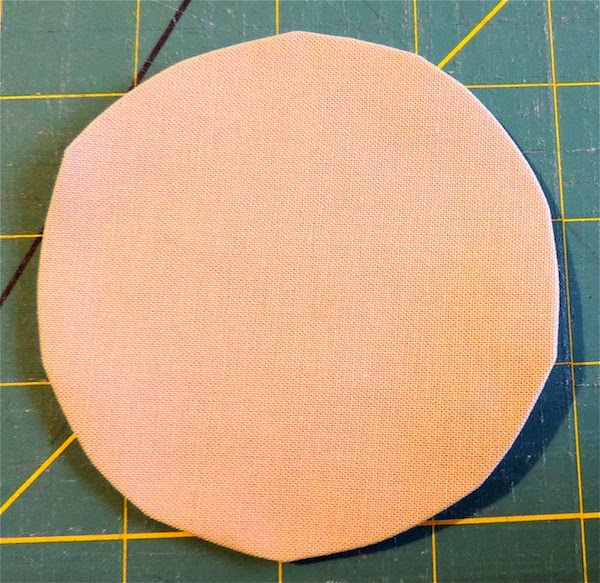
40. Trim away excess fabric from back, as shown, and set aside.

41. Go back to your Round Window paper pattern pieces. Cut off the seam allowance by cutting on the sewing line. Using these as templates, cut circles from card, as shown.

42. Take a piece of aluminium foil larger than your circles. Lay your Outer Window fabric circle on the foil wrong side up. Lay your Outer Window card circle on the centre of your fabric, as shown.

43. Carefully fold your foil tightly over the edges of the card circle – this is folding the fabric edges at the same time – and press.

44. Separate your foil, card and fabric carefully and set aside your fabric circle.

45. Repeat steps 42, 43 and 44 using your Inner Window piece from step 40.
46. Sew your Inner Window onto your Outer Window.

Set aside.
48. Press and attach Door Part 3 to Door in the same way as steps 30. and 31. above.


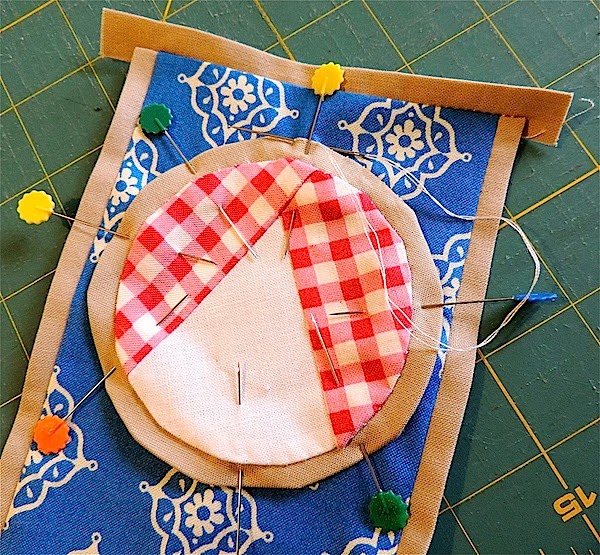


52. Take the remaining strip of your Caravan and position one window at each end. Position each window in the centre of the strip 5 3/4″ from the end, as shown.


 |
| USE PLENTY OF PINS |
 |
| BETWEEN YOUR STITCH IN THE DITCH LINES YOU CAN SEW ON YOUR FIRST QUILTING LINE |
 |
| SIDE ONE PINNED |
56. Attach the second side of your Caravan, repeating steps 54 and 55.
 |
| FIRST PIN BOTH ENDS |
 |
| SECURE THE CENTRE WITH PINS (THESE MAY NEED ADJUSTING LATER) |
 |
| MANHANDLE YOUR PIECE TO GET THE CORNERS TO LAY FLAT AGAINST THE CURVE |
 |
| SIDE TWO PINNED |

STAGE SEVEN – ATTACHING THE LINING AND THE
BOTTOM BACKGROUND
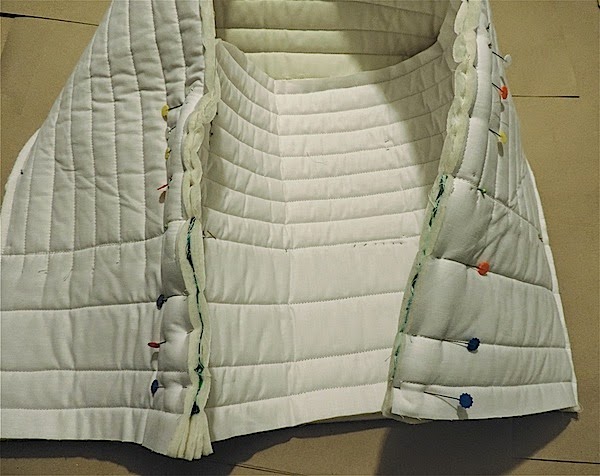
58. Position lining inside your cover and pin as shown and secure to the top corners of your cover with some small hand stitches.

59. Prepare a strip of background fabric 60″ X 5″ and press lengthwise. Fold over one end approx 1/4″ and press.
 |
| PLEASE PRETEND THIS STRIP IS ALL GREEN! |
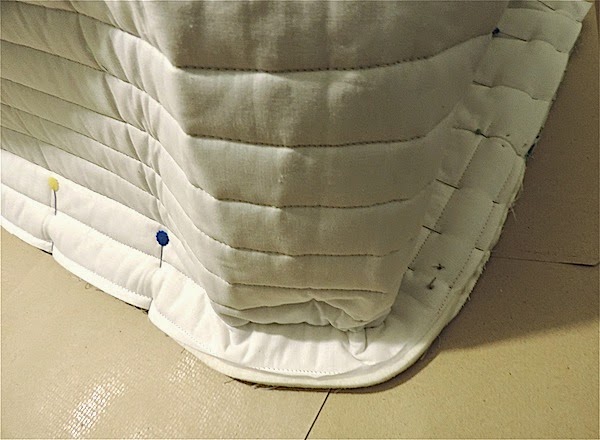
60. Align your background strip with the bottom of your lining, raw edges together, and pin in place. Work clockwise beginning with your folded end.
61. Starting about 4″ from your folded end, sew with a 1/4″ seam until you get to about 4″ from your folded end, as shown.
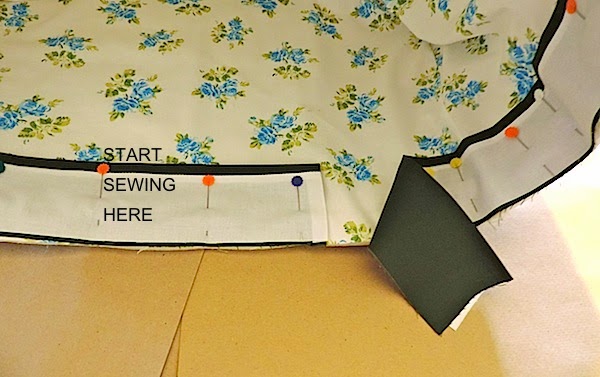
61. Unpin your folded end. Lay your raw edged end inside the folded end, as shown.

62. Continuing sewing until your strip is secured right around.


63. Fold your strip to the right side of your cover. Pin and slip stitch to right side just above your second quilting line, as shown.

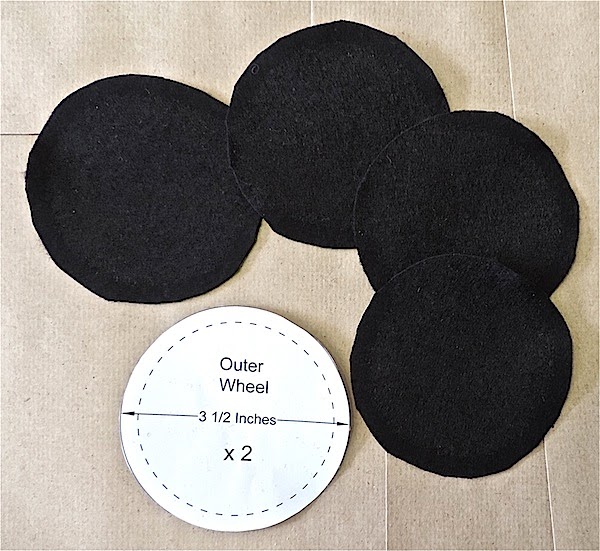
STAGE EIGHT – THE WHEELS


THE END!

Allison Babcock
I can't get over how stinking CUTE this is! Thank you for the awesome pattern and tutorial. I'm sharing this with my Mother-in-law because it is absolutely perfect for her.
LikeLike
Sherry Hill
Started to reply Great Idea when I realized the info is from you Marti! Now I know it is a really Great idea!
LikeLike
Kay
Thank you for such a cute project with the terrific tutorial. I am excitedly looking forward to making one soon.
LikeLike
LindieLee
Beyond adorable! However, I have Juki – huge – perhaps a Mac truck or double decked red bus would suit my machine better.
LikeLike
Stacie
I made one for my sister for Christmas. She loves it, and now I'm going to have to make one for myself! If I had any idea how to upload a picture, I would. Thanks for the adorable pattern!
LikeLike
Stacie
I made one for my sister for Christmas. She loves it, and now I'm going to have to make one for myself! If I had any idea how to upload a picture, I would. Thanks for the adorable pattern!
LikeLike
Lara B.
This is absolutely darling Janine! You did such a great job with it and I love all the cute details you added! Your instructions look fantastic! I love old caravans too. I made a cottage sewing machine cover (when writing my book) and found that using Lazy Girl Designs “Stiff Stuff” worked very well as structural support. There is another product called ByAnnies Soft and Stable that I would like to try too.
LikeLike
speciallearninghouse
This is absolutely adorable! I love it! <3
LikeLike
theladybugsgarden
I love it. My girlfriends and I are going to make one.
Thanks,
Stephanie
LikeLike
Jennifer Deans
Hello!
I’m about to purchase this pattern from your Etsy shop. I have a couple of questions.
Do you have to include the lining? I would have to include the finishing strip on the bottom, but could I skip the lining? Also, I wanted to include a hole in the top so the carry-handle of my sewing machine could pop through. Have you heard of anyone doing this before?
Thanks so much,
Jennifer
LikeLike
Pearl
I made it and did not use the lining. It worked out!
LikeLike
Pingback: Nach diesem Projekt willst Du Deine Nähmaschine nie wieder abdecken! | Overlock Nähmaschinen Vergleich
Pingback: Supersüße Abdeckung für Deine Nähmaschine | Overlock Nähmaschinen Vergleich
Pingback: Vintage Camper Sewing Projects - Sew Some Stuff
Lea
~ Vintage Caravan Cover ~
I have a question about the Two Buttons to back Wheel Buttons.
I am not clear on how those get attached to the Wheels?
Can you describe where to place them?
Thank you.
LikeLike
Janine @ Rainbow Hare
Hi, You just sew them inside the lining behind the buttons that show on the front. You can do this at the same time as the front buttons so your thread will pass through – first hole of front button, cover, first hole of back button, second hole of back button, cover, second hole of front button, first hole of front button and so on. The only point of the back buttons is to cover the stitches from sewing on the front buttons to make the inside neater so you can skip them if you wish :)
LikeLike
Laura Balat
Awesome! Just one question: how can I readjust the sizes if my machine is bigger?
Thanks!
LikeLike
Janine @ Rainbow Hare
Thank you, Laura. You can find a blog post about adjusting the size here: https://rainbowhare.com/2015/02/20/vintage-caravan-sewing-machine-cover-adjusting-the-pattern/
LikeLike
SUSAN M GARDNER
I have not made this yet but you asked for suggestions and I was thinking that using Annie’s soft and stable would work well. I have made some of Annie’s patterns and she quilts the outside and the lining together then puts binding on the exposed seams to cover them. I really think it would be perfect for this pattern.
LikeLike
Janine @ Rainbow Hare
Thank you, Susan. that does sound like a good suggestion :)
LikeLike
Pingback: A lot can happen in a year! – Someday Sewing
Susan
I love this cover! Can’t wait to make one! Thanks for sharing.
LikeLiked by 1 person
Laura Niezgoda
What is wadding? Is it the same as batting? How thick is it? Thanks!!!
LikeLike
Janine @ Rainbow Hare
Hi, Wadding is batting. The Hobbs version I used for this tutorial was a medium weight and I used three layers. I have since found that one or two layers of Soft and Stable works very well and is easier to sew :)
LikeLike
Lisa DeAngelis
This is adorable!! I can’t wait to try it!
LikeLike
irishapples
I made the pattern minus the flags and I’m looking for buttons to put on a place for my wheels. I love my caravan. Great cover for my machine and I’m thinking of making a second one for my other machine or modifying it to make a cover for my serger.
LikeLike
LeVetta
I am soooo excited to try this! My machine sits in a public area of our house and this is the perfect solution! I made a tool apron using a caravan inspired fabric and this will be the perfect companion piece. But it will have to wait until after Christmas.
LikeLike
Barb Gardiner
This is absolutely adorable! I can say that, as I grew up Building the Real campers! My Sister and I were raised as our Father’s sons. we handled routers, nail guns and staplers as professionals of our craft and I am Sad to say we didn’t get to keep any of these Rosscraft Travel Trailers for ourselves. So now I indulge myself by making camper replicas in fabric. Thank you for such a cute project!
LikeLike
Pearl
I purchased the pattern on Etsy for myself and I have a person who wants me to make one for them. They would pay me. Is this allowed?
LikeLike
Rosemary
I absolutely love this pattern! We have a vintage camper, and I am anxious to get started on this adorable cover. My question: How can. I make a hole in the top for the handle to come through? Thanks!!
LikeLike
Janine @ Rainbow Hare
Hi, Rosemary, Thank you for visiting. I suggest you make your hole in the roof strip of the lining and bind around it before sewing it to the side pieces. Then do the same (make your hole and bind the edges) with the main roof strip after quilting it but before sewing it to the main side pieces. Then proceed with the tutorial ignoring the holes. Finally, as a very last step, slip stitch the hole in the lining to the hole in the outer cover, Best Wishes, Janine :)
LikeLike
Jill
I have shopped for and picked out the fabrics and I was wondering do you prewash your fabrics before you use them?
Thanks for the adorable idea love it!
need
LikeLike
Jan Peterkin
I recommend using Soft and Stable from ByAnnie for sturdiness without the bulk. You can easily sew through it and it’ll stand up!
LikeLiked by 1 person
Janine @ Rainbow Hare
Thanks, Jan, I agree. I don’t use it in the pattern because it is not readily available everywhere and is sometimes very expensive but if you can access it affordably it is very much easier to sew :)
LikeLike
Pingback: Máquina de coser; como hacer una funda. - Labores en Red
Anonymous
Hi, I’m sewing this machine cover for Christmas to give to my sister. Quick question, in the tutorial where you show a picture of a tape measure showing the height of one side of the caravan (p. 11) (13 1/4”). What is the length of the caravan at this point. I’m struggling a bit with this step. Thank you for your help. Cheryl Jones
LikeLike
Janine @ Rainbow Hare
Hi, Cheryl, The length is 20 1/2. If you are on page 10 and the lined up pattern pieces are not measuring 20 1/2 (including seam allowance) please check the inch gauge on your pattern sheets as it may be you have not printed them scaled at 100%. I’m answering here as I have no contact info for you. If you have further questions, you can use the contact button here on my blog or send me a convo on etsy and I’ll be able to reply to you directly, Janine :)
LikeLike
Maureen Kirk
I am struggling with step 13- it says to assemble the 2 pieces right sides together but the picture shows the right side of the printed caravan piece up so it isn’t right sides together???
LikeLike
Susan
Hello, bought your pattern and was wondering about the seam allowance. You mention 1/4 inch in spots. Is it 1/4 inch throughout the pattern?
LikeLike
Janine @ Rainbow Hare
Yes that is correct :)
LikeLike